Task 2(a) Factors Affecting Dish Choice
Consider cost, portion control, balanced diet, time of day, customer needs, equipment, skills, environmental issues and organoleptic factors.
Suggested Band: -
Suggested Mark: 0/8

Consider cost, portion control, balanced diet, time of day, customer needs, equipment, skills, environmental issues and organoleptic factors.
Suggested Band: -
Suggested Mark: 0/8
Consider vitamin loss, fat absorption, water-soluble nutrients and nutrient retention.
Suggested Mark: 0/4
Learning to read food labels is one of the most valuable skills when trying to make healthier choices. Food labels contain critical information about the nutritional content, ingredients, and health claims of packaged food items, allowing you to make informed decisions that support a balanced diet. Here’s a deeper look into understanding and making the best choices for your health with a guide to food labels.
When looking at a food product’s label, one of the first sections to examine is the Nutritional Information Panel. Typically located on the back or side of the package, this panel provides information about the nutrient content, including calories, macronutrients (carbohydrates, proteins, and fats), and micronutrients like vitamin D and vitamin C. Here’s a breakdown of what to look for:
The ingredient list on a food package shows all the ingredients in descending order by weight, so the first few ingredients make up most of the product. For instance, if brown sugar or high-fructose corn syrup is listed among the first ingredients, it’s a sign the food is high in added sugars.
When evaluating ingredients, also look for healthier main ingredients, like whole grains and fresh fruits, rather than processed fillers or refined grains. Be mindful of nutrient content claims, such as “low-fat” or “high-protein,” which food manufacturers often use to market their products. Some claims are regulated by agencies, but not all labels are strictly monitored. The American Heart Association and British Heart Foundation recommend focusing on the actual nutritional content rather than relying on these claims alone.
In the grocery store, you’ll often see nutritional claims like “supports a healthy heart” or “fortified with vitamin D” prominently displayed on the principal display panel at the front of the pack. Although some of these claims have merit, they should be weighed alongside the full nutritional profile of the food. Health claims are sometimes misleading, suggesting that the product offers positive impacts on health without actually being a healthy choice overall.
Portion size is another critical factor. For example, a single serving of a beverage product might contain a high level of sugars and calories, yet the number of servings in the whole package could be two or three times as much as the single serving. Be mindful of the portion of the food listed, as it can influence the number of calories and grams of fat you’re consuming.
The percent daily value on labels gives an estimate of how much of each nutrient contributes to an average person’s daily intake. For instance, if a product’s label shows 20% of your daily value for dietary fibre, it’s a high-fibre choice.
When examining packaged foods, it’s helpful to compare ingredient information and nutrient content among similar products. Look for shorter ingredient lists with whole foods near the top of the list, avoiding items with excessive additives, preservatives, or artificial flavors.
In some countries, food labels include traffic lights to provide a quick guide to nutrition. Green represents a healthier option, yellow is moderate, and red signals higher levels of certain nutrients like sugars, fats, or salt. This front-of-pack labelling is commonly used in the UK and helps consumers make better food choices at a glance. It is worth exploring a guide to food labels in different countries if you’re planning a holiday.
Nutritional labels are designed to help you meet dietary guidelines and make better food choices for a healthier diet. Here are some additional tips for navigating labels in line with health goals:
For those with specific health goals or dietary restrictions, a registered charity like the British Heart Foundation or dietary guidelines provided by organizations such as the NHS can offer resources to support heart-healthy and balanced food choices.
Understanding food labels can be an empowering tool to make healthier choices for yourself and your family. I hope this guide to food labels has been useful. By focusing on whole ingredients, portion sizes, and amount of energy in food products, you can enjoy a nutritious, balanced diet that meets your unique health needs. Use these tips next time you’re in the grocery store to navigate labels, assess nutrition facts, and find the best options for a healthy lifestyle.

It’s stew season: the best time to cozy up to a bowl of super hearty, super warming crockpot beef stew!
Beef stew has to be one of the coziest, most comforting things to make and eat. Who doesn’t love tender, juicy little nubbins of beef and perfectly cooked potatoes, carrots, and onions all snuggled up in a rich and flavorful gravy? Pair a bowl with a loaf of crusty hot bread and you have my idea of heaven.
At its heart, beef stew ingredients are very simple: aromatics, beef, vegetables, stock. Everyone knows and loves beef stew, but this beef stew is particularly good. It’s a take on my all time favorite stew ever, Vietnamese bo kho, a super flavorful rich and hearty stew.

Are you a crockpot lover? Maybe you grew up with a crockpot happily bubbling away on the countertop or maybe you’re a recent crockpot convert. Either way, I’m pretty sure that crockpots were made for beef stew. They might as well have called them beef stew pots, am I right?

There’s a little bit of wiggle room for preference. If you like your vegetables firm, you’ll probably want 10 hours. If you want vegetables you can squish, you’ll want 12.


Bo kho has all of your usual beef stew suspects: beef, onions, carrots, and potatoes, but the seasoning is where the fun happens. Lemongrass adds a zippy undertone and star anise, fennel and cinnamon add warmth. It’s SO good. If you’re looking for something super comforting, yet different, this is the beef stew for you.

The secret to really, really good stew is to not buy those precut pieces of stewing beef. All too often, those pieces have no collagen, no connective tissue, no fat, and no flavor. Yes, they’re super convenient and I’ve bought them many times, but I’ve learned from my mistakes. Now I like to buy whole cuts and cut them myself.
For stew, you want pieces of beef that have lots of collagen and fat because well marbled meat is the key to stews that are rich, tender, and juicy. Cooking low and slow will magically turn those pieces into melt in your mouth pieces of deliciousness.


This crockpot beef stew has zero browning. That’s right, it’s a no browning crockpot beef stew. I am a huge fan of browning meat – it adds SO much flavor. But sometimes, you just want to throw everything in to a pot, set it, and forget it. This is truly one of those super easy recipes were you don’t have to brown the beef. Of course, if you want to take the extra step, please feel free, it’ll take your stew over the top.

We have the casserole crock, which holds 2.5 quarts. It’s so cute and perfectly-sized for this recipe, but a regular sized 7 quart crockpot will work too.
Can you make this stew in an Instant Pot if you don’t have a crockpot? Yes! You can just use the slow cooker low mode and follow this recipe exactly the same, but you can even pressure cook and it’ll taste just as good!
To make this crockpot beef stew in the Instant Pot, add all of the ingredients minus the carrots ad potatoes and cook on high for 35 minutes. Quick release, then add the potatoes and carrots and cook on high pressure for 7 minutes. Quick release, stir, and enjoy! Click here for more in-depth instructions on making Instant Pot beef stew.
We like our beef stew with a loaf of crusty bread but here are some other suggestions as well:
I hope you give this crockpot beef stew a try. It’ll fill your house with amazing smells and fill you up with flavor. May beef stew be in your future!
xoxo steph


A slow cooker take on Vietnamese bo kho, a super flavorful rich and hearty beef stew.
Serves 4
Toss the beef in the flour and season with salt and pepper.
Add the beef, along with the garlic, ginger, onion, potatoes, carrots, tomato paste, beef broth, fish sauce, and soy sauce to the crock pot. If your potatoes are poking out, push them down and add a bit more beef broth to make sure they’re covered.
Optional spice packet: wrap the star anise, fennel, cloves, bay leaf, and cinnamon stick in cheese cloth or place in a large tea bag for easy removal later. Add it to the stew.
Top with the lemongrass, cover, and cook on low for 10-12 hours on low or high for 4-6 hours. Stir occasionally. Remove the lemongrass and spice pack and enjoy warm!
Nutrition Facts
Crockpot Beef Stew
Amount Per Serving
Calories 310
Calories from Fat 72
% Daily Value*
Fat 8g12%
Saturated Fat 2.9g18%
Cholesterol 101mg34%
Sodium 1058mg46%
Potassium 952mg27%
Carbohydrates 18.2g6%
Fiber 2.6g11%
Sugar 3.7g4%
Protein 39.4g79%
* Percent Daily Values are based on a 2000 calorie diet.

The only recipe you need here! So fresh, so zesty, and sure to be a hit with EVERYONE at dinner, potlucks and picnics!

I promise you – this will be the only pasta salad recipe you will ever need this summer, and all the summers to come.
It’s chockfull of so many fresh veggies along with the easiest homemade dressing.

The best part is that you can prep/dice/chop all your veggies and herbs while you cook and cool your pasta so not a minute goes to waste here.
Let chill and serve when desired, tossing in that fresh arugula right before serving. So so good.


The only recipe you need here! So fresh, so zesty, and sure to be a hit with EVERYONE at dinner, potlucks and picnics!
salad
The Best Pasta Salad
Chungah Rhee
Tag @damn_delicious on Instagram and hashtag it #damndelicious.

This post may contain affiliate links. Please read my disclosure policy.
This roasted sweet potato and arugula salad recipe features some of my favorite fall flavors and always tastes so delicious this time of year.

Things are finally (fi-na-lly!) cooling off here in Barcelona this week after the summer’s unrelenting heat wave, which of course instantly has me craving all of my nostalgic fall faves…including this yummy roasted sweet potato and arugula salad. ♡
It’s a simple one that you could easily make anytime of year. But the combination of roasted potatoes, tart dried cranberries and toasted pecans always feels so quintessentially “fall” to me. And when combined with fresh peppery arugula, creamy avocado, tangy goat cheese (or whatever cheese you love best), and a zippy lemon dressing, this salad hits the perfect balance between cozy and hearty yet still fresh and light, which feels just perfect for these sometimes-warm, sometimes-cool days we’re enjoying right now as we move into the new season ahead.
Here in our house, we most often serve this as an entrée salad, but it would also make a lovely side dish for a dinner or holiday meal if you’d like. And if you feel like adding in an extra protein, some grilled chicken or bacon would be delicious mixed in too.
Let’s make some salad together!

To make this delicious roasted sweet potato and arugula salad, you will need:

There are so many delicious ways that you can customize this fall salad recipe, so please feel free to make it your own! For example, you are welcome to…

Looking for more green salad recipes to enjoy this season? Here are a few of my faves:

This Favorite Fall Salad recipe is made with the most delicious collection of vibrant, seasonal, simple ingredients.

This Lemony Hearts of Palm and Avocado Salad is a fast and easy side salad recipe or make it a main dish with your favorite protein.

I grew up eating hearts of palm right out of the can, so adding them to salads is nothing new to me. They have a slightly nutty flavor similar to artichoke hearts, with a creamy and crunchy texture. They combine perfectly with lemon, arugula, and avocado. If you’re new to hearts of palm, they are sold in a jar or can at the supermarket, and they even come in noodle form, which I used in this Hearts of Palm Noodle Peanut Stir Fry. Make it a meal with protein like chicken breast, shrimp, air fryer roasted chickpeas or salmon.

Hearts of palm are ready to eat straight out of the can. You do not need to cook them.
This lemony hearts of palm salad has six main ingredients, plus olive oil, salt, and pepper. It’s a versatile recipe, so feel free to add whatever veggies you have on hand, like cucumber, bell pepper, or shaved carrots.
You can make this hearts of palm arugula salad a meal by adding chicken breast, shrimp, air fryer roasted chickpeas or salmon for protein. It also works as a side dish with roasted chicken, favorite pasta, or soup.

Your comments are helpful! If you’ve tried this healthy Lemony Hearts of Palm Recipe or any other on Skinnytaste, don’t forget to rate the recipe and leave me a comment below. And if you took a photo or video, share it with me on Instagram or Tiktok!
4+
This Lemony Hearts of Palm and Avocado Salad is a fast and easy side salad recipe or make it a main dish with your favorite protein.
Place onions in a medium bowl, season with 1/4 teaspoon Kosher salt, set aside while you prep the remaining ingredients.
Add the hearts of palm and tomato to the onions, add fresh 2 tablespoons fresh lemon juice, drizzle with 2 tablespoons extra virgin olive oil, 1/4 teaspoon salt and fresh black pepper.
Place arugula in a large salad bowl, and arrange the avocado.
Pour everything over the salad and serve right away, toss before serving.
Serving: 11/2 cups, Calories: 145kcal, Carbohydrates: 8g, Protein: 2.5g, Fat: 12.5g, Saturated Fat: 2g, Sodium: 166mg, Fiber: 4g, Sugar: -1g
Keywords: hearts of palm, hearts of palm salad, side dish salad

15 Minute Green Goddess Salad Recipe filled with crisp green lettuce, cucumber, tomato, avocado green pepper and sunflower seeds then topped with creamy green goddess dressing for the perfect bite.
Make it a meal and add a little protein to the top with my Grilled Chicken or Garlic Herb Roasted Shrimp.

With the right combination of fresh ingredients and a stellar dressing to tie everything together, salads are my kind of comfort food. Not only do they deliver on both flavor and texture, but they also leave you feeling lively and refreshed. This quick and easy dish is destined to join the ranks of your top favorite salad recipes!
Vibrant green vegetables give this salad its signature color while the tomato, red onion and sunflower seeds sprinkle in some nice variation. The dressing coats each component with a lightweight layer of tangy, herby, garlicky goodness. It all comes together to form heaven in a serving bowl! Nothing beats a big bite that combines a little bit of everything.

I honestly couldn’t envision a more fitting name for this dish – it contains a lot of green and it tastes divine enough for a goddess! However, there’s actually another reason why this salad was given its name.
The dish was first created to be served as a starter for the lead actor of a play called “The Green Goddess.” Ever since it was brought to life at the Palace Hotel in 1923, different adaptations of green goddess salad have been composed in kitchens across the world. I’ve personally tried a bunch of different versions, and this one is the best of the best!

Let’s go over the good-for-you ingredients that make up this tempting salad. The amounts are included in the recipe card below this post.


Get ready to fall in love with the convenience of this recipe. You’ll have a wholesome salad on the table in no time!


Check out the helpful hints below to ensure the success of your salad.
Green goddess salad doesn’t come with a strict formula – it’s super flexible! Here are some worthwhile ways to switch it up every so often:

So many different dishes will complement this crave-worthy salad, from Air Fryer Salmon to Grilled Chicken Kabobs. If you’re adding a protein and turning it into an entree, partner it with Garlic Ranch Potatoes or Honey Roasted Carrots. Anything you’d normally serve with a fresh green salad is fair game!
Keep leftover green goddess dressing chilled in an airtight jar and refrigerate any extra salad ingredients in a separate airtight container. The salad will last for up to 24 hours and the dressing will stay good for 5 days. Note that neither one is suitable for freezing.

15 Minute Green Goddess Salad Recipe filled with crisp green lettuce, cucumber, tomato, avocado green pepper and sunflower seeds then topped with creamy green goddess dressing for the perfect bite.
Keep leftover green goddess dressing chilled in an airtight jar and refrigerate any extra salad ingredients in a separate airtight container. The salad will last for up to 24 hours and the dressing will stay good for 5 days. Note that neither one is suitable for freezing.
Keywords: green salad with dressing, green goddess salad dressing, healthy salad

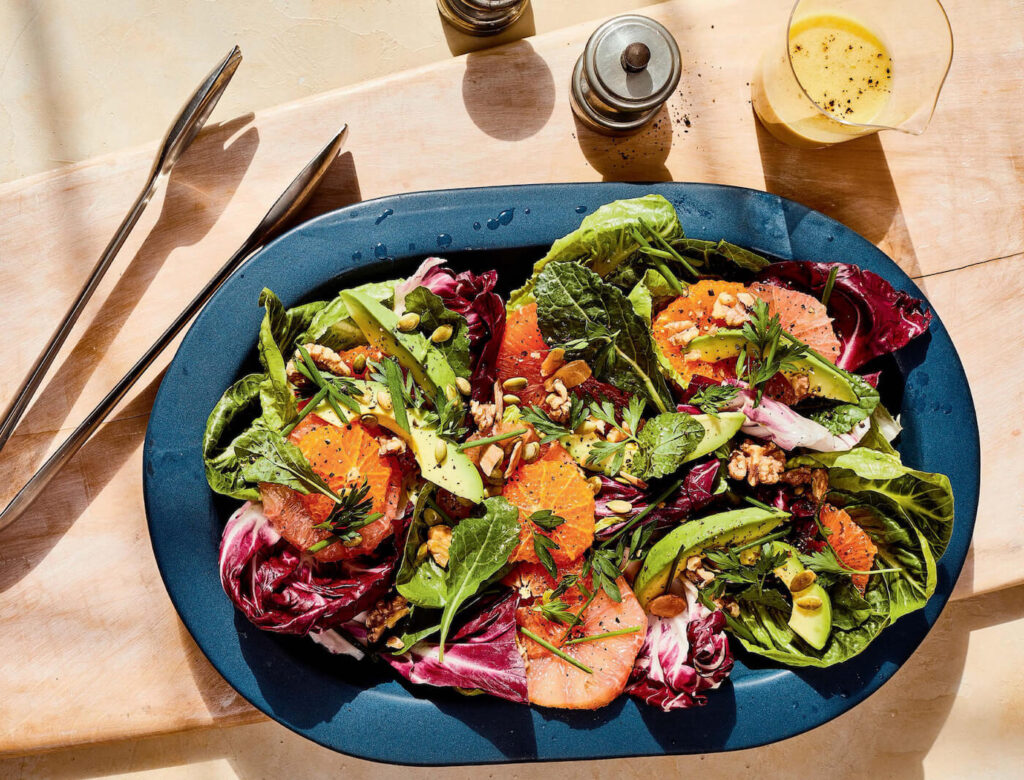
“This is my simple dinner salad and, truth be told, it may be a little different from what you’re expecting. Don’t get me wrong, I love a good garden salad with ranch dressing and maybe bacon bits. But being a California girl, salad for me has always meant greens with whatever fruit is in season—pears, apples, grapes, Cara Cara oranges, clementines—and lots of avocado, crunchy nuts or seeds, whatever herbs I have on hand, a basic vinaigrette, and sometimes a little soft goat cheese crumbled on top. The crunchy, sweet, and bright combination of these items makes the perfect salad for me, and it gets served alongside dinner at least five out of seven nights per week at my house.” —Walker
for the maple-cider vinaigrette:
2 tablespoons pure maple syrup
1½ tablespoons apple cider vinegar
½ tablespoon Dijon mustard
juice of ½ lemon
¼ teaspoon ground coriander
¼ teaspoon ground cinnamon
¼ teaspoon ground cumin
⅛ teaspoon ground turmeric
½ teaspoon fine sea salt
¼ teaspoon freshly ground black pepper
½ cup extra virgin olive oil
for the salad:
8 cups loosely packed mixed greens
1 small head radicchio, leaves torn into bite-size pieces
1½ cups fruit (sliced apples, pears, oranges, and/or figs; halved grapes; or clementine segments)
½ cup toasted nuts and seeds (lightly salted walnuts, almonds, sunflower seeds, toasted pepitas, and/or pecans)
¼ cup chopped fresh flat-leaf parsley, basil, cilantro, chives, or green onions (white and green parts)
2 avocados, halved, pitted, peeled, and diced
¼ cup vinaigrette or Maple-Cider Vinaigrette
1. First, make the Maple-Cider Vinaigrette (if using): In a bowl, whisk together the maple syrup, vinegar, mustard, lemon juice, coriander, cinnamon, cumin, turmeric, salt, and pepper. Slowly drizzle in the oil while whisking vigorously. Use immediately, or transfer to a jar, cap tightly, and store in the fridge for up to 3 weeks. Shake well before using.
2. In a large salad bowl, layer the greens, fruit, nuts and/or seeds, herbs, and avocado. Toss gently to combine. Drizzle with the vinaigrette and toss again to coat. Serve immediately.
Recipe extracted from Healthy in a Hurry by Danielle Walker. Copyright © 2022 by Simple Writing Holdings, LLC. Published by Ten Speed Press, an imprint of Random House, a division of Penguin Random House LLC. Photography © 2022 by Aubrie Pick.
Originally featured in
3 Quick Paleo Dinner Recipes from Danielle Walker

Every item on this page was chosen by The Fed & Fit team. The site may earn a commission on some products (read more here).

Did you know the lentil is one of the oldest standing legumes and has been providing sustenance and nutrition to humans since prehistoric times? They are humble in nature, but incredibly nutritious and super filling. Loaded with protein, complex carbohydrates, fiber, and a plethora of minerals (like iron, folate, and phosphate), they are a quick-cooking option for adding depth to any meal, including this quick and easy lentil soup.
This red lentil soup is really something special. The aromatics of onion, garlic, ginger, and carrot build the foundation of flavor that enhances the earthy, nutty notes of the red lentil, all engulfed in a rich and creamy broth with just a hint of spice. Optional (but HIGHLY recommended) is to top your soup with a spoonful of crispy, garlic Tarka. The butter-fried garlic adds a little sweetness and a soft crunch that bursts with flavor in your mouth. This soup will warm your tastebuds and your soul, and we hope it finds its way into your regular fall rotation!

Feel free to pick and choose garnishes as you’d like! The garlic Tarka is more involved but really, really delicious.
For how bold and delicious this soup is, the process is pretty easy! Here’s how you’ll do it:
This soup is delicious alongside naan or any other flatbread. If you’re looking for a veggie accompaniment, this simple arugula salad pairs beautifully too!
Store your leftover lentil soup in an airtight container in the refrigerator (for up to 5 days) or freezer (for up to 3 months). Let the soup thaw in the fridge overnight (if frozen), and then reheat on the stove or in the microwave until warmed through!

Q Do red lentils have to be soaked before cooking?
This recipe does not call for soaking the lentils ahead of time. They’ll head straight into the pot with the broth, coconut milk, and crushed tomatoes, and simmer until cooked!
Q Do you need to pre cook lentils for soup?
You don’t! The dry lentils will go into the pot as is!
Q What does red lentil soup taste like?
This red lentil soup is bold and super flavorful. The curry powder gives it a delicious Indian-inspired flare.
Q What can I add to red lentil soup?
We recommend garnishing your soup with garlic Tarka, coconut milk, cayenne, cilantro, and a squeeze of lime. Alternatively, a dollop of plain full-fat yogurt, a drizzle of olive oil, a squeeze of lemon, or fresh chopped parsley would also be delicious.

Just for You
Want more recipe ideas like this?
Heat coconut oil in a large pot over medium. Once the oil is warm, add the onions and saute until translucent, about 4 minutes, stirring occasionally.
Add garlic, ginger, and carrots and saute for 1 minute. Then add spices to coat the vegetables.
Add broth, coconut milk (reserving 1/4 cup for garnish), crushed tomatoes, salt and lentils. Bring the soup to a low boil, reduce to medium-low, cover the pot and simmer gently until the lentils are tender, but not mushy, 20-25 minutes.
If you’re making the garlic Tarka: in a small pot or skillet, melt the ghee over medium-low heat. Add the garlic and cook, stirring occasionally, for 4 to 5 minutes, until the garlic is golden brown (do not let it burn).
Garnish with a drizzle of the garlic Tarka (optional), a ¼ cup of coconut milk, a pinch of cayenne, chopped cilantro, and a squeeze of lime.
Nutrition Facts
Red Lentil Soup
Amount per Serving
% Daily Value*
* Percent Daily Values are based on a 2000 calorie diet.