Roasted Red Pepper Soup

Table of Contents[Hide][Show]

I love soup weather. From tomato soup to this roasted red pepper soup, I can’t get enough. A delicious soup makes a great weeknight meal and they’re perfect to reheat on busy days. Here’s my recipe for how to make a flavorful red pepper soup that’s naturally gluten-free and dairy optional.

Roasted Red Pepper Soup Ingredients

There are a lot of reasons to love this soup. It’s packed with healthy veggies, which is always a plus in my book. Peppers are really high in vitamin C, which is also great for cold and flu season. The garlic and onion not only add flavor, but they’re also good for fending off the sniffles this time of year.

I use nutrient-dense chicken stock here, but vegetable stock will also work if it’s what you have on hand.

The recipe includes instructions for how to easily roast your own peppers in the oven. If the weather is warm enough outside, you can also throw them on the grill for a grilled pepper flavor. When I’m running a little short on time, sometimes I’ll use jarred roasted red peppers instead. You can usually find them in glass jars at the local grocery store.

Soup Toppings

A creamy soup is the perfect vehicle for toppings. Instead of crusty bread or croutons though, our family prefers a dollop of sour cream. You could also add some fresh, chopped herbs like basil or oregano or a dash of black pepper. A drizzle of heavy cream or extra virgin olive oil is also a nice way to top it off.

Make it a Meal

Since it’s packed with veggies I like this as a side dish, but you could easily turn it into the main course if you want. Add a little chicken or Italian sausage to the soup after blending for some more protein. This is a great way to use up leftover chicken from the day before too.

Tips for Making the Soup

The process is simple enough, but here are a few tips for getting the perfect roasted red pepper soup.

  • Don’t overcrowd the baking sheet when roasting the peppers and tomatoes. If they’re overlapping and squished together they tend to steam instead of getting a nice, crispy skin on them.
  • Don’t overfill the blender (if using one). I like using my immersion blender for this recipe, but a regular blender will also work. Just be sure not to fill it more than halfway at a time with the hot soup or you’ll have a hot (and dangerous!) mess.
  • Make extra for later. This soup tastes even better after the flavors have had more time to meld. It also freezes well.
  • Adjust the level of spice. It has a mild kick to it, but if your family doesn’t like spicy food then omit the red pepper flakes if desired. Or if you can’t get enough of the heat, then add some more!
roasted red pepper soup

Roasted Red Pepper Soup Recipe

Katie Wells

A simple and flavorful recipe for pureed roasted red pepper soup with tomatoes, garlic, basil, and a sprinkle of red pepper flakes for heat.

Prep Time 10 mins

Cook Time 23 mins

Total Time 33 mins

Course Dinner, Lunch

Cuisine American

Servings 8

Calories 131 kcal

Instructions 

  • Preheat the oven to 425°F.

  • Halve the red peppers and remove the stems and seeds.

  • Place the bell pepper and tomatoes, cut side down, on a large baking sheet.

  • Place the garlic cloves in between the peppers and tomatoes wherever there is room.

  • Place the baking sheet in the preheated oven and roast for 20 minutes.

  • Use the broiler to cook for an additional 3 minutes to get a little charring on the skin of the vegetables.

  • In a large pot on the stovetop, heat the oil over medium heat.

  • Saute the onion and carrot until slightly softened.

  • Add the white wine and simmer for 5 minutes.

  • Add the broth, Italian seasoning, red pepper flakes, and salt.

  • Simmer over low heat, stirring occasionally until the peppers and tomatoes have finished cooking.

  • Add the roasted peppers, tomatoes, and garlic to the pot on the stove.

  • Using an immersion blender (or working in batches in a blender), puree the soup until smooth.

  • Serve with a spoonful of sour cream and/or garnish with fresh basil if desired.

Notes

  • Make this soup into a heartier meal by adding leftover cooked chicken or Italian sausage.
  • Store any leftovers in an airtight container in the fridge. 

Nutrition

Calories: 131kcalCarbohydrates: 9gProtein: 6gFat: 8gSaturated Fat: 2gPolyunsaturated Fat: 1gMonounsaturated Fat: 4gCholesterol: 8mgSodium: 629mgPotassium: 390mgFiber: 1gSugar: 3gVitamin A: 1741IUVitamin C: 15mgCalcium: 50mgIron: 1mg

What’s your favorite soup on a cold day? Leave a comment and let me know!

Romanian Bean Soup with Smoked Meat and Tarragon

This Romanian Bean Soup with Smoked Meat and Tarragon (Ciorbă de Fasole cu Afumătură și Tarhon) is hearty, comforting and delicious. As with most recipes in Romania, every household puts their own little spin on it. This version is courtesy of my in-laws who live in Brașov, a city nestled in the Carpathian mountains in the Transylvanian region of Romania.

Romanian Bean Soup with Smoked Meat Recipe Easy

What You Need for Romanian Bean Soup with Smoked Meat

  • Smoked Meat: The main flavour of this soup comes from smoked meat (AKA afumătură in Romanian). Smoked pork knuckle (ciolan) is most often used, but you can substitute just about any kind of smoked meat you like, such as smoked pork ribs or smoked sausage. My mother-in-law likes to use smoked turkey legs and wings, which still gives you a delicious smoky flavour and aroma, but a less greasy finished product.
  • Beans: It wouldn’t be a bean soup without the beans! For sake of time and convenience, my in-laws like to use canned white beans in this soup. They make for a softer and creamier finished product, which I tend to prefer. You can use any kind of white bean you like, such as white kidney or cannelinni.

    Dried, white beans, specifically fasole de boabe, are more commonly used in Romania. Keep in mind that if you use dried beans, you will need to soak them in water overnight and then boil them several times before adding them to the soup.

Ciorba de Fasole cu Afumatura Romanian Bean Soup with Smoked Meat Recipe
  • Vegetables: This soup is loaded with a combination of onion, carrot, parsley root, celery root, and bell pepper. The thing that most Romanian soups have in common is that the vegetables are almost never sautéed, but rather are boiled.
  • Fresh Herbs: Thyme, parsley and tarragon really bring this Romanian bean soup to life. Fresh will give you the best aroma and flavour, but you can substitute dried if that’s what is available to you. If you use dried herbs, use approximately half the amount listed for fresh.

    The tarragon (tarhon) in particular adds a very pronounced flavour and aroma to the dish. It has the ability to overpower some of the other flavours in the soup, specifically the smokiness from the meat, so add a little at a time until you reach your preferred amount.

Romanian Bean Soup with Smoked Meat Ciorba de Fasole cu Afumatura
  • Garlic: Adding lots of finely chopped garlic a few minutes before the soup is finished cooking will kick the flavours up a couple notches and compliment the smoky flavours.
  • Sliced Red Onion: This soup is customarily served at the table with some thinly sliced red onion. Like the garlic, it helps cut through the richness of the smoked meat – especially if using smoked pork knuckle.
Ciorba de Fasole cu Afumatura Romanian Bean Soup with Smoked Meat Recipe
Romanian Bean Soup with Smoked Meat Recipe Easy

Print

Romanian Bean Soup with Smoked Meat and Tarragon

This Romanian Bean Soup with Smoked Meat and Tarragon (Ciorba de Fasole cu Afumatura si Tarhon) is hearty, comforting and delicious.
Course Dinner, Lunch, Soup
Cuisine Eastern European, Romanian
Keyword Ciorba de Fasole, Ciorba de Fasole cu Afumatura, Romanian Bean Soup
Prep Time 20 minutes
Cook Time 2 hours
Servings 8 servings

Ingredients

  • 1 pound bone-in smoked turkey legs or wings substitute smoked pork hock or smoked pork ribs
  • 1 large white onion diced
  • 1 large carrot diced
  • 1 medium red bell pepper diced
  • 1 medium celery root peeled and diced
  • 1 medium parsley root peeled and diced, substitute parsnip
  • 2 small sprigs fresh thyme substitute 1 teaspoon dried
  • 28 oz canned white kidney beans substitute cannellini beans
  • 1 tablespoon tomato paste
  • 4 cloves garlic finely chopped
  • 3 tablespoons finely chopped fresh tarragon
  • 2 tablespoons finely chopped fresh parsley
  • Kosher salt and black pepper to taste
  • 1 small red onion thinly sliced, for garnish

Instructions

  • Rinse the smoked turkey and add it to a large stock pot with 5 quarts of cold water. Set over high heat, bring to a boil, cover partially with a lid and cook until the meat is tender and starts to fall away from the bone, around 1.5 hours. Reserving the cooking liquid, transfer the turkey to a bowl, let cool to the touch, separate the meat from the bone and roughly chop the meat. Set aside.
  • Reduce the heat to medium-low or a gentle simmer and add the white onion, carrot, bell pepper, celery root, parsley root and thyme. If necessary, add more water to the pot for a total of 5 quarts. Cover partially with a lid and cook, stirring occasionally, until the vegetables have slightly softened, around 15 minutes. Add the beans, tomato paste, reserved shredded turkey meat and bones, and cook, stirring occasionally, until the vegetables are soft and fork-tender, around 10 minutes. Add the garlic, tarragon, and half the parsley. Cook for 2 minutes, taste for seasoning and adjust with salt and pepper as desired.
  • For best flavour, let the soup sit for at least 30 minutes before serving in individual bowls garnished with parsley and red onion on the side.

Crab and Corn Chowder | Tasty Kitchen: A Happy Recipe Community!

Vegan Snickers Cookies Gluten-free – Vegan Richa

Soft and chewy Vegan Snickers Cookies studded with dates and peanuts and smothered with chocolate ganache! These are made with almond flour and tapioca flour and therefore gluten-free and grain-free ! They are not too sweet but such a satisfying treat along with a cup of coffee. Peanut-free version included.

a white plate with vegan snickers cookies covered with chocolate glaze

Good news: You are only about 20 minutes away from having a plate of these addictive chocolate-covered Vegan Snickers Cookies on your kitchen counter! We all deserve a cookie or two, am I right? Let’s make it two! Did I mention these are gluten-free?

These are studded with sticky sweet chopped dates and crunchy peanuts! That’s right, no caramel, no peanut butter needed here! If Snickers are your thing, you will adore these glutenfree almond flour cookies.

We use a blend of almond flour and tapioca flour for these vegan snickers cookies! Almond flour gives these the perfect chew while tapioca starch helps bind and gives these the perfect crisp-outside texture.

vegan glutenfree snickers cookies with chocolate glaze

These have All of the amazing flavor of snickers bars in cookie form. Dates get baked into sweet caramelly bits. Peanuts in the cookie dough add a fabulous crunch. You can also add more peanuts on top of the chocolate topping. The baked cookies are dipped in melted chocolate that makes them the perfect snickers cookie bites!

More snickers inspired recipes:

Vegan Snickers Baked Oatmeal

Vegan Snickers Peanut Butter Cups – must makr!

Vegan Snickers Snack Bar Recipe

Vegan Peanut Butter Chocolate Tart

Peanut Butter Cup Chocolate Bark

Print Recipe

Vegan Snickers Cookies

Soft and chewy Snickers Cookies studded with dates and peanuts and smothered with chocolate ganache! These are made with almond flour and tapioca flour and therefore gluten-free! They are not too sweet but such a satisfying treat along with a cup of coffee! Peanut-free version included. 

Prep Time15 mins

Cook Time12 mins

Chill time15 mins

Total Time42 mins

Course: Dessert, Snack

Cuisine: American

Keyword: glutenfree snickers cookies, Snickers cookies almond flour, vegan snickers cookies

Servings: 10

Calories: 198kcal

Author: Vegan Richa

Ingredients

  • 1 cup (112 g) almond flour (blanched superfine preferable. Natural also works)
  • 3 tablespoons tapioca starch
  • 1/2 teaspoon baking soda
  • 1/8 teaspoons salt
  • 1/2 teaspoon cinnamon
  • 1 tablespoon powdered sugar
  • 6 soft dates chopped in small pieces, use 7-8 if smaller dates
  • 2 tablespoons chopped roasted unsalted peanuts
  • 1 tablespoon semi solid refined coconut oil
  • 3-4 tablespoons maple syrup

To top

  • ½ cup (90 g) vegan semi sweet chocolate chips or chopped vegan chocolate bar
  • 1 teaspoon coconut oil or use 1 Tablespoon peanut butter

Instructions

  • In a bowl add all the dry ingredients. That’s almond flour, tapioca starch, baking soda, salt cinnamon, powdered sugar. Mix really well. Press to break all the almond flour lumps. Add the dates and peanuts and mix in.

  • Melt your coconut oil and add that and 3 tablespoons of maple syrup to the bowl. If you like you can also add a few drops of vanilla extract. Then mix everything really well. If the mixture isn’t coming together as a soft dough, add in maple syrup one teaspoon at a time to bring the dough together.

  • You want a really soft slightly sticky, and not dry dough. so a little extra maple syrup is okay.

  • Let the mix sit for 5 minutes. Meanwhile, preheat the oven to 335F( 170 c),  line your baking sheet with parchment paper.

  • Using a scoop or your hands, take about 2 to 2 ½ tablespoons of the mixture and make into a flat disk, press onto the baking sheet.

  • Repeat for all the cookies, you’ll get 9-10 cookies. Keep them at least 1.5 inch apart as the cookies do spread a lot.

  • Put the baking sheet in the oven and bake for 10-12 minutes or until the edges are golden brown. Remove the baking sheet from the oven; let the cookies cool on the baking sheet for 10 to 15 minutes.

  • Meanwhile, melt your chocolate and coconut oil in a double boiler or the microwave. (Microwave it for 30 seconds then microwave again in 15-second batches until the chocolate starts to melt a little bit then start whisking it and whisk for 30 seconds or until is evenly melted.)

  • Once the cookies are cool to touch, pick a cookie and dip the tops in the melted chocolate and set aside for the chocolate to set.  (Or you can also just drizzle the chocolate on the tops of the cookies and make designs of choice. You can also add more chopped peanuts on top of the chocolate).

  • Chill the cookies for 15 mins in the fridge to set the chocolate and enjoy!Store on the counter for the day. Refrigerate for upto a week. 

Notes

To make these peanut free, you can use chopped up cashews or almonds instead.
To make these Oilfree: omit the oil and use 2-3 teaspoons more maple syrup. If making them Oilfree, use blanched almond flour and not natural 
Nutfree: make my other regular or gluten-free cookies and add dates, peanuts to the dough and dip baked cookies in melted chocolate

Nutrition

Nutrition Facts

Vegan Snickers Cookies

Amount Per Serving

Calories 198
Calories from Fat 117

% Daily Value*

Fat 13g20%

Saturated Fat 5g31%

Sodium 86mg4%

Potassium 124mg4%

Carbohydrates 19g6%

Fiber 3g13%

Sugar 12g13%

Protein 4g8%

Vitamin A 7IU0%

Vitamin C 0.02mg0%

Calcium 42mg4%

Iron 1mg6%

* Percent Daily Values are based on a 2000 calorie diet.

a plate of vegan glutenfree almond flour snickers cookies covered with chocolate glaze

Ingredients:

  • these gluten-free cookies are made with a blend of almond flour and tapioca starch
  • baking soda gives these a bit of a rise
  • salt brings out the sweetness
  • I like to add some cinnamon to these
  • the cookie dough is sweetened with sugar and maple syrup
  • coconut oil is added as a fat
  • that “snickers” feel is achieved by adding chopped dates instead of caramel and of course peanuts
  • the chocolate ganache is made with using a mix of coconut oil and chocolate

Tips:

  • To make these peanut free, you can use chopped-up cashews or almonds instead.
  • baked goods with almond flour burn quickly so don’t leave these out of sight and don’t bake them at a higher temperature than recommended.
  • Almond flour can often usually be replaced successfully with raw cashew flour or sunflower seed flour but the latter has a bit of a greenish tint which might look a bit less pleasing. For Nutfree: make my other regular or gluten-free cookies and add dates, peanuts to the dough and dip in melted chocolate

ingredients needed for making vegan glutenfree snickers cookies

How to make Gluten-free Snickers Cookies

a glass bowl with almond flour and tapioca starch

In a bowl add all the dry ingredients. That’s almond flour, tapioca starch, baking soda, salt cinnamon, and powdered sugar. Mix really well and press to break all the almond flour lumps.

dry ingredients for snickers cookies in a glass bowl

Add the dates and peanuts and mix in.

chopped dates and nuts being added to dry cookie ingredients in glass bowl

dry mix for vegan snickers cookies in a glass mixing bowl

Melt your coconut oil and add that and 3 tablespoons of maple syrup to the bowl. If you like you can also add a few drops of vanilla extract.

maple sryrup being added to dry ingredients in glass bowl

Then mix everything really well. If the mixture isn’t coming together as a soft dough, add in maple syrup one teaspoon at a time to bring the dough together.

vegan snickers cookie dough in a glass bowl

You want a really soft, not dry dough so a little extra maple syrup is okay.

Let the mix sit for 5 minutes. Meanwhile, preheat the oven to 335F( 170 c), and line your baking sheet with parchment paper.

unbaked vegan snickers cookies on a cookie sheet

Using a scoop or your hands, take about 2 to 2 ½ tablespoons of the mixture and make into a flat disk, press onto the baking sheet.

Repeat for all the cookies, you’ll get 9-10 cookies. Keep them at least 1 inch apart as the cookies do spread a lot.

freshly baked vegan snickers cookies baking on a cookie tray

Put the baking sheet in the oven and bake for 10-12 minutes or until the edges are golden brown. Remove the baking sheet from the oven; let the cookies cool on the baking sheet for 10 minutes.

Meanwhile melt your chocolate and coconut oil in a double boiler or the microwave. ( microwave it for 30 seconds then microwave again in 15-second batches until the chocolate starts to melt a little bit. Then whisk it for 30 seconds or until is evenly melted.)

Once the cookies are cool to touch, pick a cookie and dip the tops in the melted chocolate and set aside for the chocolate to set.  Or you can also just drizzle the chocolate on the cookies and make designs of choice. Chill the cookies for 15 mins to set the chocolate and enjoy!

a plate of vegan snickers cookies covered with chocolate glaze

Storage:

Store on the counter for the day. Refrigerate for upto a week.

Easy Lemon Bundt Cake – Semi-Homemade!

This Easy Lemon Bundt Cake is a delicious retro recipe from my childhood. We all need a few shortcuts this crazy time of year! Dense, moist, and irresistible, it’s just as appropriate for a summer pitch-in as it is for a holiday dessert!

This Lemon Cake Recipe starts with a yellow cake mix which is doctored up to the point you’d think it was made from scratch. When you’re short on time, but want an Easy Cake Recipe, I’ve got you covered!

Easy Lemon Bundt Cake slice on a square white plate with lemon and orange slice garnishes.

Why You Must Make

  • It’s one of the easiest cakes you’ll ever make!
  • A box of instant lemon pudding adds a burst of citrus flavor without having to zest or squeeze any lemons.
  • No one will ever guess this is made with a cake mix! It tastes like it’s made from scratch.

This lemon bundt cake was one of those recipes that my mom got from her bridge club friends. Back in the day, before the Internet, recipes made the rounds the old-fashioned way. The ladies would rotate between each others’ homes for a few hands of cards, snacks, and desserts. My mom had a stash of handwritten recipe cards from decades of these gatherings. Most were easy and almost all were a hit with my sisters and me.

This lemon bundt cake was dubbed “Mock Baba Cake,” possibly in homage to the Baba au Rhum cake, which is a yeast cake soaked in a liquor-spiked syrup. Like many desserts from back in the 1970s, this one started with a cake mix. Doctored up, this lemon cake bore no resemblance to the uninspired yellow cake mix from which it originated.

Ingredient Notes

Lemon Bundt cake ingredients on a sheet pan with labels.
  • Box of Yellow Cake Mix – Both Yellow and Butter Flavors work. I prefer Butter. 15.25 ounce box.
  • Small Box of Instant Lemon Pudding Mix – 3.4 oz box.
  • Water
  • Vegetable Oil – Canola oil works well. Avoid olive oil as you want a more neutral flavored oil.
  • Eggs – At room temperature
  • Powdered Sugar – Sift to remove lumps
  • Butter – Melted
  • Orange Juice Concentrate – Defrosted. Provides a deep citrus flavor to the glaze.

How to Make

Process shots 1, 2 for easy lemon bundt cake.
  1. Mix cake batter.
  2. Pour into prepared Bundt pan and bake as directed.
Easy Lemon Bundt Cake process shots 3.4.
  1. Make the glaze, then using a wooden skewer, poke holes on the under-surface of the cake, and drizzle with a quarter to a third of the glaze.
  2. Invert the cake onto a cooling rack over a sheet pan. Poke holes across the top of the cake, then brush the surface with the glaze. Cool completely, slice, and dig in!
Easy Lemon Bundt Cake on a white cake plate with lemon and orange slices.

Expert Tips

A box of cake mix, instant lemon pudding, eggs, and oil combine to make a sweet, dense pound cake. A unique glaze made with orange juice concentrate (yes, they still sell the stuff!!) doubled the citrus punch.

  • I actually prefer a butter cake mix as it seems to have less of an artificial taste than the yellow cake, but truthfully, both that or a yellow cake mix works well.
  • Just add the instant pudding, eggs, water, and oil to the cake mix and beat until well combined.
  • Prep your Bundt pan with an oil and flour spray, like Baker’s Joy or Pam’s version, so the cake will release from the pan easily.
  • Bake as directed and check doneness by poking a toothpick into the middle of the cake. If it comes out clean, the cake is done. If not, bake another 5 minutes and recheck.
  • Cool the cake on a wire rack for 10-15 minutes before releasing it from the pan. It needs some time to cool so it doesn’t fall apart when you flip it over onto the cooling rack. If you wait too long, the cake will stick. I like to give it a little shake back and forth to help loosen the cake from the walls of the pan, before inverting.
  • Cool slightly before glazing. Make sure to sift your powdered sugar if you want a smooth, lump-free glaze.

This lemon Bundt cake is easy peasy to make, yet tasty enough to serve to guests! Both picky palates in the house were thrilled with this cake. I think you will be, too.

Overhead view of easy lemon bundt cake on a white cake plate.

Frequently Asked Questions

Why Do You Add Pudding Mix to a Cake Recipe?

Besides a nice boost of flavor, the pudding mix also adds moisture and density to the cake.

What’s the Best Way to Add Lemon Flavor to a Cake?

Lemon zest, with its aromatic essential oils, adds a more intense lemon flavor to a recipe than lemon juice. It’s a delicious way to boost the lemon intensity of any recipe. 
Also, rubbing the lemon zest into any sugar called for in the recipe will help release the oils and flavor the sugar which will then flavor the cake.

Easy Lemon Bundt Cake on a square ceramic dessert plate.

You May Also Like:

Everyone knows how busy it is around the holidays. Shopping, wrapping, and parties fill our days. Easier recipes are a huge bonus, especially when they’re as tasty as those we’re sharing today. If you love this lemon Bundt cake, don’t miss my Kentucky Butter Bundt Cake recipe!

Photo and text collage of Lemon Bundt Cake.

Love this recipe? Please leave a 5-star rating in the recipe card below & a review in the comments section further down the page.

Stay in touch with me through social media @ Instagram, Facebook, and Pinterest. Don’t forget to tag me when you try one of my recipes!

Ingredients

Cake:

  • 1 box yellow or butter cake mix (15.25 ounces)
  • 1 small box instant lemon pudding mix (3.4 ounces)
  • 3/4 cup water
  • 3/4 cup vegetable oil
  • 4 eggs

Glaze:

  • 1 cup powdered sugar, sifted
  • 2 tablespoons butter, melted
  • 1/3 cup frozen orange juice concentrate, defrosted

Instructions

  1. Preheat oven to 350º. Butter and flour a standard Bundt pan (or spray with Baker’s Joy). Set aside.
  2. Combine all cake ingredients in a bowl and beat until thick and smooth, about 3 minutes.
  3. Pour into the prepared pan. Bake for 45 minutes or until a toothpick inserted into the center of the cake comes out clean.
  4. When the cake is almost finished baking, whisk together glaze ingredients until smooth.
  5. When cake is removed from the oven, let cool for about 10 minutes.
  6. Then poke some holes over the surface of the cake with a long pronged fork. Drizzle part of the glaze over the cake.
  7. Invert cake onto a cake plate. Poke the top surface of the cake with the fork and drizzle the rest of the glaze over the cake.
  8. Let cool completely before serving.

Notes

¼ cup of rum can be substituted for ¼ cup of the water if you’d like a lemon rum cake.

Recommended Products

As an Amazon Associate and member of other affiliate programs, I earn from qualifying purchases.

Nutrition Information:

Yield:

12

Serving Size:

1 slice

Amount Per Serving:

Calories: 243Total Fat: 19gSaturated Fat: 3gTrans Fat: 0gUnsaturated Fat: 14gCholesterol: 73mgSodium: 88mgCarbohydrates: 17gFiber: 0gSugar: 14gProtein: 3g


HOW MUCH DID YOU LOVE THIS RECIPE?

Please leave a comment on the blog or share a photo on Pinterest

Creamy Sausage and Peppers Over Mashed Potatoes

Typically, you see creamy sausage and peppers over pasta, but we are going to blow your mind with it served over creamy mashed potatoes!

This recipe is inspired by our whole wheat penne sausage and peppers. I had a little cream left in the fridge that I tossed into the sauce, and I loved the extra richness that the cream added! 

We were in the middle of moving at the time and my kitchen was half packed. When I went to grab the penne, all my pasta was already packed, but my potatoes were still sitting in the pantry. I figured, why not?! And we absolutely LOVED the change in carb! I mean, you can’t go wrong with mashed potatoes!

a photo of a shallow bowl filled with creamy mashed potatoes on one side and creamy sausage and peppers on the other side.


I love a quick dinner recipe with simple ingredients! Here is your grocery shopping list with a quick explanation of each ingredient. I find it so helpful to get a little snapshot of what I’m going to need for a recipe before getting into all the details!

  • Italian Sausage Links – you can get mild, sweet or spicy depending on what flavor you prefer
  • Green Peppers –  remove the stem and seeds and slice into thin slices
  • Red Pepper – remove the stem and seeds and slice into thin slices – red peppers are a little sweeter than green peppers so they add another dimension of flavor
  • Yellow Onion – we prefer a yellow onion, sliced thin
  • White Wine (cooking white wine) – we don’t drink alcohol so we cook with cooking wine, but feel free to use whichever you prefer – you can also use chicken broth if you don’t want to use wine at all
  • Fire Roasted Tomatoes – adds a tiny bit of heat and so much flavor to the sauce
  • Tomato Paste – a 6oz can, any brand works – just choose your favorite
  • Tomato Sauce – an 8oz can, any brand works – just choose your favorite
  • Water – thins the sauce out a little and helps blend all the ingredients together
  • Italian Seasoning – a dried seasoning blend that you can buy at the grocery store that usually includes dried basil, dried oregano, dried rosemary, dried thyme and dried marjoram
  • Sugar – enhances the flavors
  • Salt – adds flavor
  • Heavy Cream – adds richness and all the creaminess to the sauce
  • Parmesan Cheese – you can buy shredded parmesan or shred your own or use the grated parm from the bottle. 

You can find the measurements for each ingredient in the recipe card at the end of this post.

a photo of a shallow bowl that is half way filled with buttery mashed potatoes with creamy sausage and peppers piled on top of them.


What is Italian Sausage?

Italian sausage most often refers to a style of pork sausage that is seasoned with fennel and garlic. You can find it at the grocery store in the pork section by the other sausage links.

What Can You Substitute For Cooking Wine?

Red or white wine vinegar, cranberry juice, ginger ale, grape juice, apple juice, and chicken or beef stock are all good substitutes for cooking wine.

For this particular recipe, I would go with chicken or beef stock as the best substitute.


a photo of a cast iron dutch oven full of a creamy pepper and onions sauce with full links of sausage in it.


Best Mashed Potatoes

We have an entire post about making the best mashed potatoes. We cover all the big questions from what kind of potatoes to use, how long to boil them, how to mash them, how many you need to feed a crowd, how to avoid the typical mashed potato pitfalls, plus how to keep them warm, reheat them and even freeze them. Head to our post there for all the details!

Can Pasta Be Used Instead of Mashed Potatoes?

You can absolutely use pasta instead of mashed potatoes if you want. Cook a good hearty pasta like penne or rotini until it is al dente. You can mix the pasta and sauce together or keep them separate and just pour the sauce over the pasta while serving.

a photo of a shallow light gray bowl with a serving of mashed potatoes topped with a creamy sausage and peppers sauce. The sausage is in full links.


Why You Will Love this Recipe

  1. Full of Flavor: When you cook the sausage in a large skillet it flavors the whole dish leaving seasoning behind for cooking the onions, peppers and creamy sauce. And let’s be honest, sausage, peppers and onions all together is a trifecta!
  2. Simple: The ingredients are all easy to find and the whole meal is made in two pots (one for the potatoes, one for the sausage and peppers) 
  3. Quick: The whole dish from beginning to end comes together in just about a half hour
  4. Family Friendly: My whole family eats this one, and that is a rarity!
  5.  Satisfying: This dish is hearty and combines your veggies, protein and carb all in one dish checking all the typical main dish boxes
  6. Versatile: Make this dish your own! Use turkey sausage, kielbasa, or chicken sausage if you want! Swap the peppers for any color peppers you want. Dial up the heat with spicy sausage or a dash of red pepper flakes. Add more cream to make it creamier! 

a photo of a cast iron skillet full of a creamy tomato sauce with sauteed peppers and onions and whole sausage links.


Reheating, Storing and Freezing Creamy Sausage and Peppers

The quickest way to reheat this dish is the microwave, especially if you’re just warming up a single serving. It should be ready in about one minute. You can also reheat the sauce on the stovetop in a skillet over medium-low heat until heated through. You’ll most likely need to add a little extra cream or milk to thin out the sauce as it reheats.

I prefer to store the creamy sausage and peppers separately from the mashed potatoes. Keep them both in the refrigerator in an airtight container. They will keep for up to 5 days.

Unfortunately, this dish does not freeze well because of the cream in the sauce. 

a photo of a shallow bowl with a serving of mashed potatoes topped with creamy sausage and peppers with a fork sticking into it with some of it eaten.


You’re going to love this recipe because it tastes totally indulgent, like you spent hours cooking it, but it comes together in just a half hour! Creamy sausage and peppers over mashed potatoes is hearty and explodes with flavor! Your whole fam will love this one!


More of Our Favorite Sausage Recipes:

a photo of a shallow bowl filled with creamy mashed potatoes on one side and creamy sausage and peppers on the other side.

Creamy Sausage and Peppers over Mashed Potatoes

Prep Time: 5 minutes

Cook Time: 25 minutes

Total Time: 30 minutes

Servings: 4

  • 1 pound Italian sausage links 1 package
  • 1 small green pepper sliced
  • 1 small red pepper sliced
  • 1 small yellow onion sliced thin
  • 2 Tablespoons cooking white wine
  • 1 can fire roasted diced tomatoes
  • 6 ounces tomato paste
  • 8 ounces tomato sauce
  • 12 ounces water
  • ½ teaspoon Italian seasoning
  • 1 teaspoon sugar
  • ½ teaspoon salt
  • 1/3 cup heavy cream
  • Parmesan Cheese for finishing
  • mashed potatoes
  • Get the potatoes boiling before you get started on the sausage and peppers so that they are ready to mash as the sausage and peppers simmer.

  • Heat a tablespoon of olive oil in a large skillet over medium-high heat.

  • Brown sausages on all sides, until almost cooked through, remove and cut into ¼ inch slices. You don’t have to worry about cooking them all the way through as they will finish cooking while the sauce simmers.

  • In the same pan drizzle another teaspoon or so of olive oil and sauté the peppers and onions until slightly softened, about five minutes.

  • Return sausage back to the pan and deglaze with white wine.

  • Add diced tomatoes, tomato paste, tomato sauce, water, Italian seasoning, sugar, salt and heavy cream.

  • Stir to combine.

  • Bring to a boil and then reduce to a simmer.

  • Simmer for ten minutes. As the sauce simmers, drain the potatoes and mash them.

  • Season with salt and pepper and garnish with grated parmesan cheese.

  • Serve over the mashed potatoes.

Store covered in the refrigerator.

Nutrition Facts

Creamy Sausage and Peppers over Mashed Potatoes

Amount Per Serving (1 g)

Calories 593
Calories from Fat 387

% Daily Value*

Fat 43g66%

Saturated Fat 17g106%

Polyunsaturated Fat 5g

Monounsaturated Fat 18g

Cholesterol 109mg36%

Sodium 1897mg82%

Potassium 1107mg32%

Carbohydrates 25g8%

Fiber 5g21%

Sugar 15g17%

Protein 21g42%

Vitamin A 2644IU53%

Vitamin C 82mg99%

Calcium 109mg11%

Iron 4mg22%

* Percent Daily Values are based on a 2000 calorie diet.

REMEMBER TO SUBSCRIBE TO our FREE Oh Sweet Basil NEWSLETTER AND RECEIVE EASY RECIPES DELIVERED INTO YOUR INBOX EVERY DAY!

When you try a recipe, please use the hashtag #ohsweetbasil on INSTAGRAM for a chance to be featured in our stories!  FOLLOW OH, SWEET BASIL ON FACEBOOK | INSTAGRAM | PINTEREST | TWITTER FOR ALL OF OUR LATEST CONTENT, RECIPES AND STORIES.

a photo of a shallow bowl filled with creamy mashed potatoes on one side and creamy sausage and peppers on the other side.


Instant Pot 5 Ingredient Chili


5 Ingredient Instant Pot Chili. Pressure cooker chili with only 5 ingredients? Yes! Here is my weeknight “meal in a hurry” chili.

Here is my “I need a weeknight meal in a hurry and only have time to dump things from jars” easy chili recipe. I take every shortcut I can without compromising the taste of the recipe. What are the five ingredients? Ground beef, chili powder, beef broth, dry red kidney beans, and salsa.

A bowl of 5 ingredient chili, topped with cheese, jalapenos, and green onion
Instant Pot 5 Ingredient Chili
Jump to:

I make this easy Instant Pot chili recipe work with minimal ingredients by making those ingredients do a lot of heavy lifting:

  • I buy higher-fat ground beef than I usually do – no need for oil.
  • I buy regular beef broth from the store, not the reduced sodium version I usually recommend. So, no need for salt.
  • I buy salsa – combining the garlic, onions, hot peppers, and tomatoes into one jar.
  • I use dried beans – yes, I need to soak them overnight, but they add a lot of flavor and body to the chili.
  • I use chili powder. Of course, I always use chili powder, but its blend of spices is the key “chili” flavor.

Now, is this the best chili recipe I can make? No, but it’s a hearty chili with minimal effort for busy days. If you’re looking for delicious recipes that don’t cut corners, check out my Instant Pot Steak Chili, Instant Pot White Turkey Chili Recipe, or Instant Pot Chorizo Chili? No, but it’s still a darned good chili with a fraction of the effort.

And, yes, I know the One True Chili Texans are in the back of the room, shouting at me. “Beans? That’s a nice soup you’ve got there, but it’s not chili.” I’ve learned to ignore them. I grew up with “wimpy chili,” full of ground beef and beans. While I love Texas chili, I love this one too.

🥫Ingredients

Ingredients for 5 ingredient Instant Pot Chili
The 5 Ingredients
  • Dry kidney beans
  • Ground beef
  • Chili powder
  • Beef broth
  • Salsa

See the recipe card for quantities.

🥘 Substitutions

Where’s the beef?

Switch out the beef for ground pork or ground turkey. (But don’t get ground turkey breast – it is too lean). Or, use meatloaf mix – a combo of ground beef and ground pork. Or, want a more bean-heavy chili? Cut back to 1 pound of ground beef and leave the remaining ingredients the same.

Beans

You can switch to any dry bean that you like in a chili. Make sure you soak your beans, no matter what type you use. Soaked black beans and small red beans need to cook for 10 minutes at high pressure, and Pinto beans or Great Northern beans cook for 15 minutes at high pressure (just like the kidney beans.) I avoid cans of beans because the extra flavor you get from dried beans is essential to this recipe.

Cut the heat

I control the heat in this recipe with the salsa. Medium salsa is my default, giving me a low-heat chili. Cooking for people who can’t stand the heat? Use mild salsa. Want medium heat? Use hot salsa. Want to rain fire down? Pass some hot sauce at the table. And yes, I have the amount of chili powder right – use ¼ cup of chili powder.

📏Scaling

This recipe doubles easily, but you need an 8-quart pressure cooker for it to fit. Cut all the ingredients in half, and this recipe will fit in a 3-quart pressure cooker. The cooking time does not change; it takes the same time to cook the chili, no matter how much you’re cooking.

☃️ Storage

Chili makes excellent leftovers and, if anything, tastes better if it’s reheated the next day. I store chili in 2-cup containers, which last for a few days in the refrigerator or 6 months in the freezer. Then I can pull out a container for a lunch-size portion, to top chili dogs, or for a chili spaghetti or chili mac dinner.

💡Tips and Tricks

The key is the 5 ingredients. Use high-fat ground beef, not low-fat ground beef. Use regular sodium broth, not low sodium broth. Use salsa, not just cans of tomatoes. Use dried beans, not canned beans. I picked the ingredients to add extra body and flavor. Skipping them will result in wimpy chili. Now, sometimes you have to cook chili with the ingredients you have, not the ingredients you want. But if you’re using more straightforward pantry ingredients, I would move on to a regular chili recipe with more ingredients.

What to Serve with 5 ingredient chili in the Instant Pot

When I’m in a hurry, I serve with pantry ingredients – stuff that comes out of cans, jars, and bags. Think tortilla chips, pickled jalapeños, sour cream, pre-shredded cheese, and bottles of hot sauce.

When I have more time, I slice a fresh jalapeno chili pepper, dice some green onions, or mince some cilantro to add to the mix. Of course, I also pull out everything above – chili night is a build-your-bowl adventure at my house.

Print

📖 Recipe

clock clock iconcutlery cutlery iconflag flag iconfolder folder iconinstagram instagram iconpinterest pinterest iconfacebook facebook iconprint print iconsquares squares iconheart heart iconheart solid heart solid icon
A bowl of 5 ingredient chili, topped with cheese, jalapenos, and green onion

Instant Pot 5 Ingredient Chili


  • Author: Mike Vrobel
  • Total Time: 8 hours 30 minutes
  • Yield: 16 cups of chili 1x

Description

5 Ingredient Instant Pot Chili. Pressure cooker chili with only 5 ingredients? Yes! Here is my weeknight meal in a hurry chili.


  • 1 pound dry kidney beans, sorted, rinsed, and soaked
  • 2 pounds ground beef (preferably 70/30 “ground beef” or 80/20 “ground chuck” lean-to-fat ratios)
  • ¼ cup chili powder
  • 4 cups store-bought beef broth or chicken broth (NOT low sodium)
  • 32 ounces salsa (mild, medium, or hot, depending on how hot you want the chili)

Suggested Toppings

  • Shredded cheddar cheese
  • Sour Cream
  • Minced green onions
  • Diced red onion
  • Pickled jalapeños
  • A bottle of hot sauce

Instructions

  1. Sort and rinse the kidney beans: Sort the kidney beans, discarding any stones, dirt, or broken beans. Rinse the beans, then do an overnight or a quick soak.
  2. Overnight soak: Cover the kidney beans with 8 cups of water, and sprinkle with 1½ teaspoons of salt. Leave the beans to soak for at least 8 hours or overnight. Drain and discard the soaking liquid.
  3. OR: Pressure Quick Soak for 1 minute with a 30-minute rest: Put the kidney beans and 8 cups of water in an Instant Pot or another pressure cooker. Sprinkle with 1½ teaspoons of salt. Pressure cook at high pressure for 1 minute (“Manual” or “Pressure Cook” mode in an Instant Pot for 1 minute), then quick release the pressure. Let the beans soak in the pot for 30 minutes, then drain the beans and discard the soaking liquid.
  4. Sauté the Ground beef and chili powder: Set an Instant Pot to sauté mode adjusted to high (medium-high heat for other pressure cookers) and add the ground beef. Cook the ground beef, stirring and breaking it up until it loses its pink color, about 5 minutes. Sprinkle the beef with the chili powder and stir until all the beef is coated with chili. Cook for 1 minute, stirring occasionally. to toast the chili powder.
  5. Everything in the pot: Pour in the beef broth and scrape the bottom of the pot to make sure no bits of browned beef are sticking. Stir in the soaked beans and the salsa.
  6. Pressure cook for 15 minutes with a quick release: Lock the lid on the pressure cooker. Cook on high pressure for 15 minutes in an Instant Pot or another electric pressure cooker, or 12 minutes in a stovetop PC. (In an Instant Pot, use “Manual” or “Pressure Cook” or “Pressure Cook – Custom” mode set to high for 15 minutes). Quick release the pressure in the pot.
  7. Serve: Remove the pressure cooker lid – open it away from you to protect yourself from the hot steam. Ladle the chili into bowls and serve with your favorite toppings. Enjoy!

Notes

If you want to use a natural release, pressure cook on high pressure for 12 minutes, with at least a 15-minute natural release. (You can quick release any remaining pressure after 15 minutes.)

  • Prep Time: 8 hours
  • Cook Time: 30 minutes
  • Category: Weeknight Dinner
  • Method: Pressure Cooker
  • Cuisine: American

Keywords: Instant Pot 5 Ingredient Chili, Pressure Cooker 5 Ingredient Chili

Sharing is caring!

Reader Interactions

This site uses Akismet to reduce spam. Learn how your comment data is processed.

Leftover Candy Peanut Butter Tart

If you are like me, you are already planning ways to make candy disappear next week. The classic technique of eating candy once your children are in bed works fine for small amounts. We’ve also bagged and distributed candy to people that pass by our house before! This Peanut Butter Tart is my latest attempt to find ways to use leftover Halloween Candy!

This tart is sort of a half cheesecake and half cream pie situation that, luckily, requires no baking besides the crust so it’s really easy to make and the flavors are wonderful.

While you might think of a peanut butter tart as being dense, it’s actually a light and fluffy, almost whipped cream, filling so it’s not as heavy or overly sweet as you might think. Then, of course, you pile on leftover candy and it becomes an entirely different thing.

So, hide away a few pieces of candy for this tart! It’s a great dessert!

Important Equipment for this tart

There are two important things you will need to make this tart.

Most importantly, you’ll need a springform pan for it to work well. These pans are great and allow you to easily release the tart so it doesn’t stick to the sides or bottom of the pan. Could you make this in a traditional pie pan? YES. But, just know that getting the first piece out will be a bit messy. After that they should come out okay.

Second, you’ll want either a hand mixer or a stand mixer to mix up the filling for this tart. The more you can whip the filling, the lighter and fluffier it will be so have a good mixer helps. I used my old hand mixer for the version I made and it worked great.

Making a Homemade Graham Cracker Crust

If I’m being honest, you could just purchase a graham cracker crust and make this recipe even easier to make. I think it would work fine.

But, a homemade graham cracker crust is a good skill to have and it’s not terribly hard to make.

Crush up some graham crackers until you have about 1 1/2 cups. You can also buy ground graham crackers but I always just have the full cookies in my pantry. Stir that together with melted butter, sugar, salt, and cinnamon and press it into your pan.

Graham Cracker Crust

The easiest way to press it in the pan is with a measuring cup which allows you to get into the circle shape of the pan.

Once you have the crust pressed in the pan evenly, bake it for about 10 minutes at 350˚F just to set the crust and then let it cool before filling it.

My Favorite No-Bake Peanut Butter Filling

This filling is very easy to make and requires no baking like a traditional cheesecake. WOOHOO!

Start by combining the softened cream cheese and peanut butter in a bowl and whip it together until combined.

Then add the heavy whipping cream slowly and continue to mix until it’s light and fluffy. Beat in the powdered sugar and pinch of salt and continue to mix the filling until it holds its shape. It should be pretty stiff.

Whipped PB Filling

If the filling is too runny, you can continue to beat it and it should thicken up.

Once it is ready, transfer it to your baked tart crust and smooth it out in an even layer.

What candy works on this tart?

I went with mostly chocolate candy for my tart: snickers, twix, M&Ms, etc. But, I think almost any candy could work in this tart. You could try it with crunchy candies like nerds or smarties or even gummy candies like skittles or gummy bears!

Because the filling is so creamy, it does help to have some candy with texture though so candy with nuts or crunchy elements do work well in my opinion.

Candy options for tart

Obviously, also chocolate and peanut butter go well together!

Storing this tart for later

Once you have this peanut butter tart put together, it’ll need to set up in the fridge for a few hours before you slice and serve it.

The good news is that it keeps really well in the fridge for probably five days or so. Good luck making it last that long, but it’ll be fine in the fridge!

My Leftover Candy Peanut Butter Tart Recipe

Candy Peanut Butter Tart

Leftover Candy Peanut Butter Tart

This no-bake Peanut Butter Tart is light and creamy and perfect for using up some leftover Halloween candy!

Prep Time 20 mins

Cook Time 15 mins

Chilling Time 2 hrs

Total Time 3 hrs

Course Dessert

Cuisine American

Servings 8 servings

Calories 524 kcal

Graham Cracker Crust

  • 1 ½ cups crushed graham crackers
  • 8 tbsp unsalted butter melted
  • ¼ cup sugar
  • 1 pinch salt
  • ½ teas ground cinnamon

Peanut Butter Filling

  • 8 oz cream cheese softened
  • 1 cup creamy peanut butter
  • 1 cup heavy whipping cream
  • 1 cup powdered sugar
  • 1 pinch salt
  • Various Halloween Candy chopped

Making the Graham Cracker Crust

  • Preheat oven to 350˚F. Crush up graham crackers and add to a small bowl with melted butter, sugar, cinnamon, and a pinch of salt.

  • Press the graham cracker crust mixture into your springform pan, working the crust up about 1/2 inch in the pan. Try to get the crust thin and even. A small measuring cup works well for pressing the crust mixture into the pan.

  • Bake the graham cracker crust for 10-12 minutes, rotating it halfway through. The finished crust should be golden brown. Let it cool before filling it.

Making the Peanut Butter Filling

  • In a medium bowl with a hand mixer (or a stand mixture with the paddle attachment), add softened cream cheese and peanut butter. Beat until combined.

  • Slowly add in whipping cream, continue to beat until the mixture is light and fluffy. Beat in powdered sugar and a pinch of salt. The filling should hold its shape. If it’s too runny, continue to beat and it should firm up as the cream firms up.

Finishing the Tart

  • When the crust is cool and the filling done, spoon the filling into the crust and spread it evenly in the tart. Chop up a few bars of various halloween candy and dot the top of the tart with the candy.

  • Chill the tart for at least two hours so it sets up completely.

  • Remove the tart from the springform pan, carefully, and slice into wedges for serving.

Leftover tart will keep fine in the fridge for up to five days. 

Calories: 524kcalCarbohydrates: 46gProtein: 14gFat: 41gSaturated Fat: 18gPolyunsaturated Fat: 5gMonounsaturated Fat: 15gTrans Fat: 0.5gCholesterol: 67mgSodium: 468mgPotassium: 323mgFiber: 2gSugar: 17gVitamin A: 803IUVitamin C: 0.2mgCalcium: 153mgIron: 1mg

Keyword Halloween Candy, Peanut Butter Desserts, Peanut butter Recipes, Tart recipes

PB Tart

Here are some other great easy dessert ideas!

I don’t have a huge sweet tooth, but I do like to make sweets for others. Desserts for the holidays like these fun peppermint snow peaks and this no cook banana chocolate pudding are SO easy to make and always a hit.

For a few reach ideas for desserts, learning how to make fresh sopapillas was a wonderful experiment I did with my young daughter and a classic Halloween recipe idea is this no-bake dirt pie from Kids Activity Zone blog!

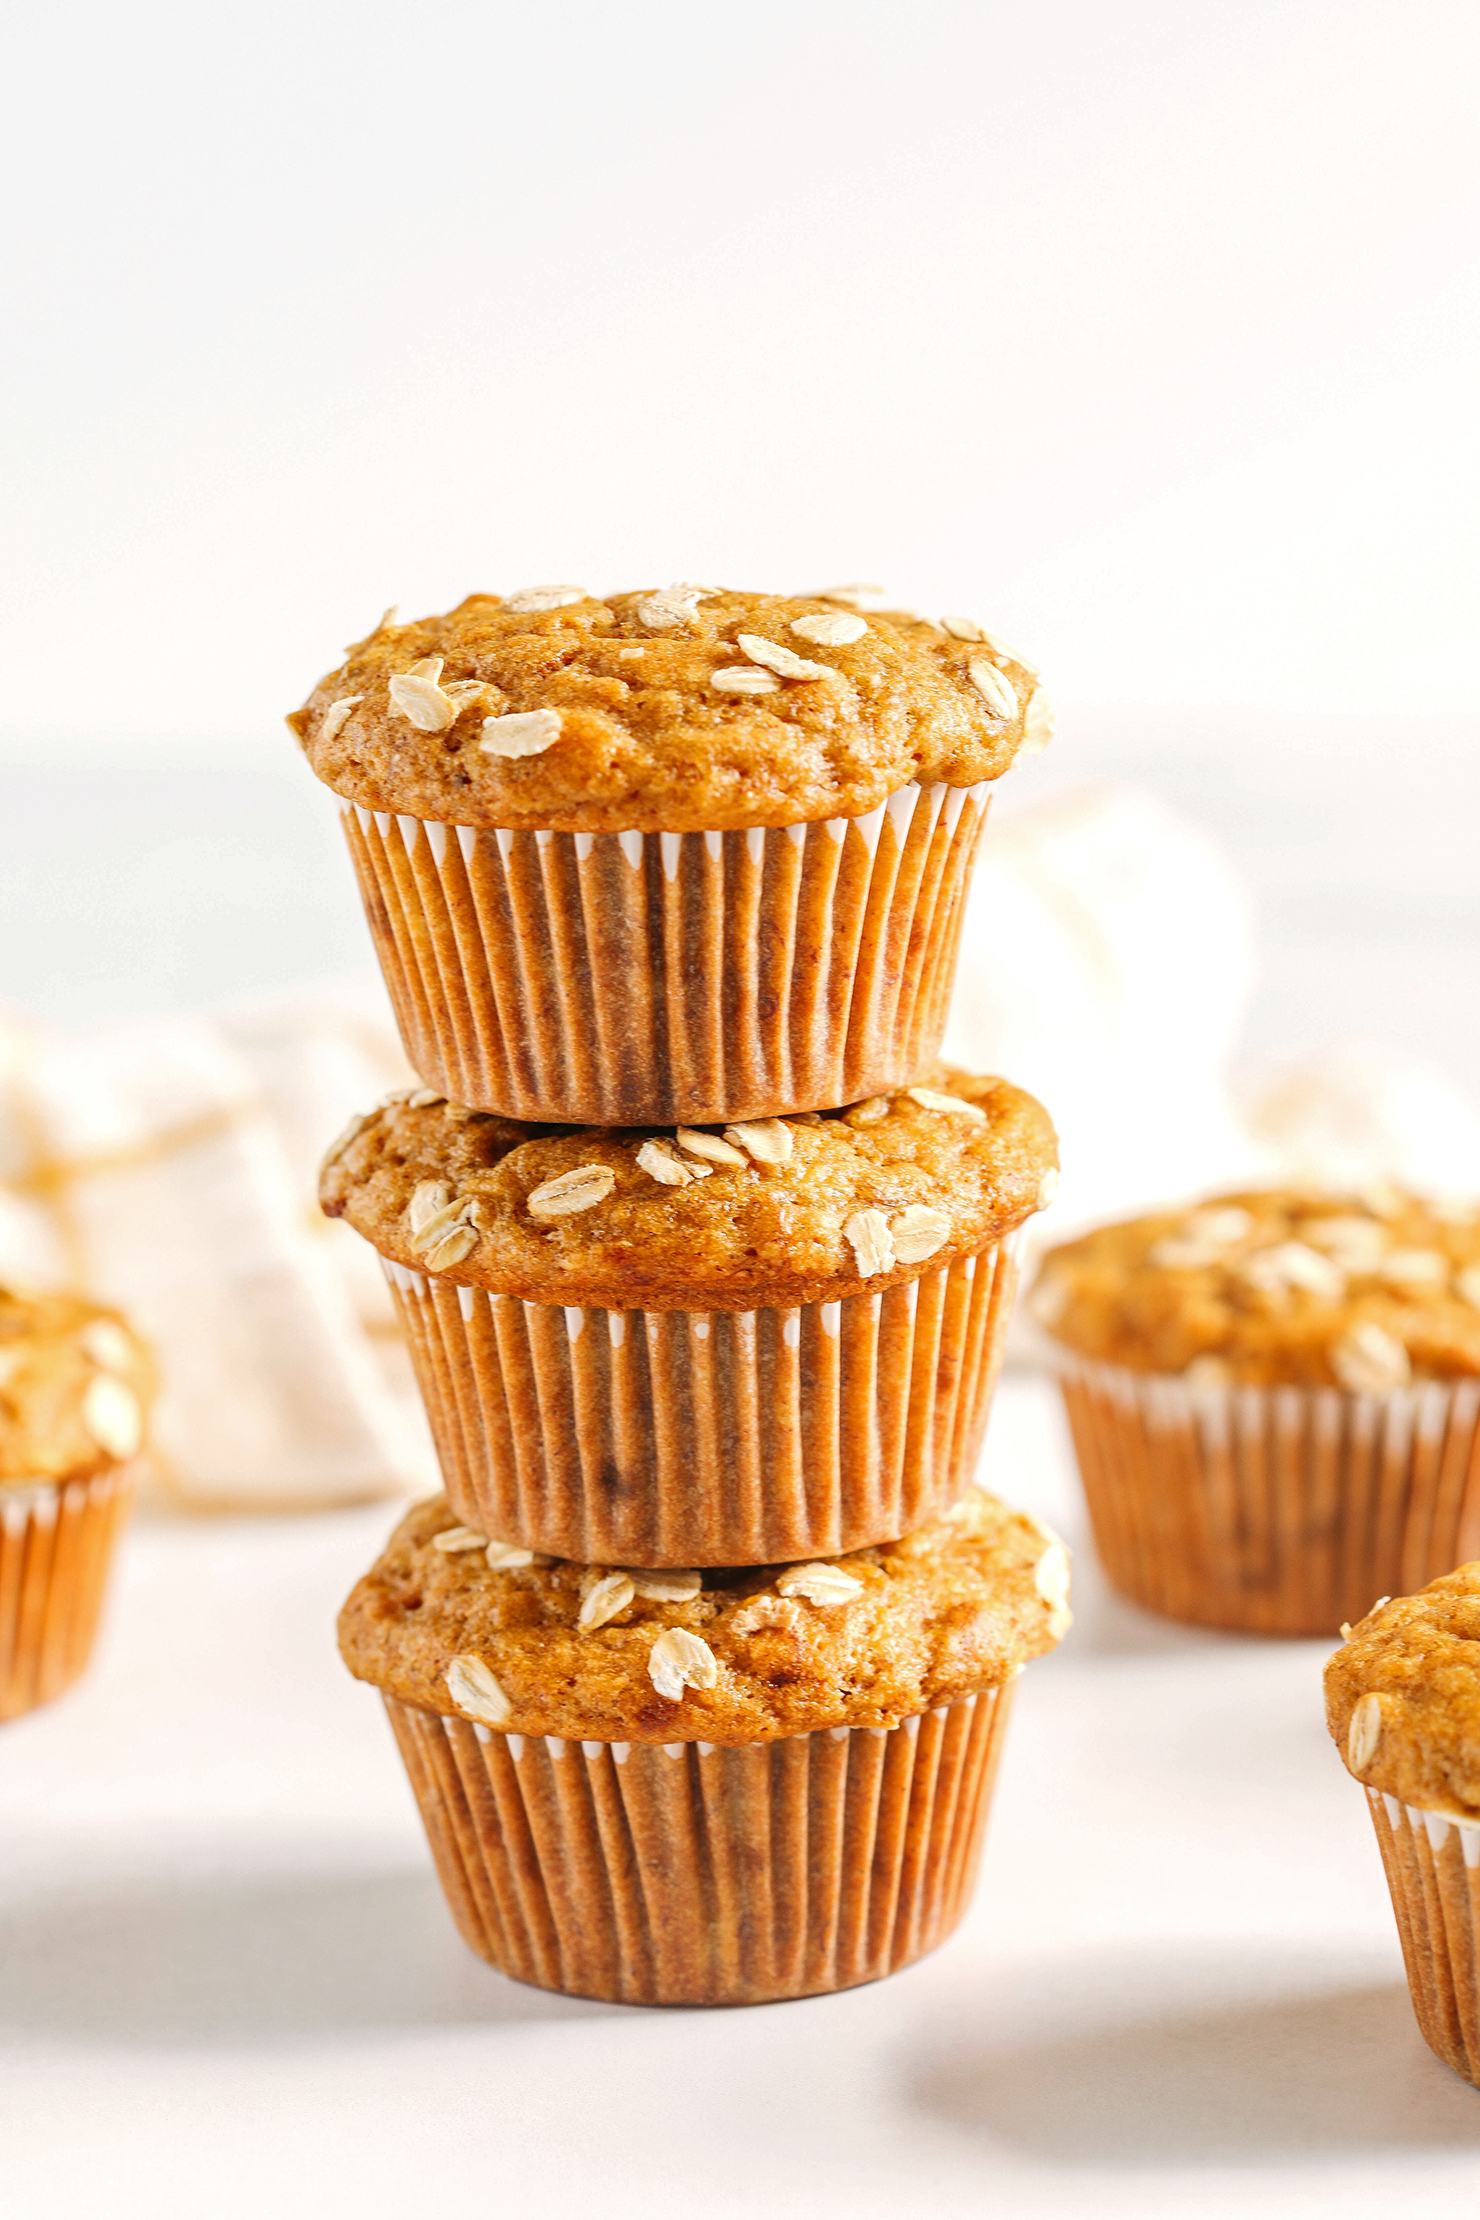
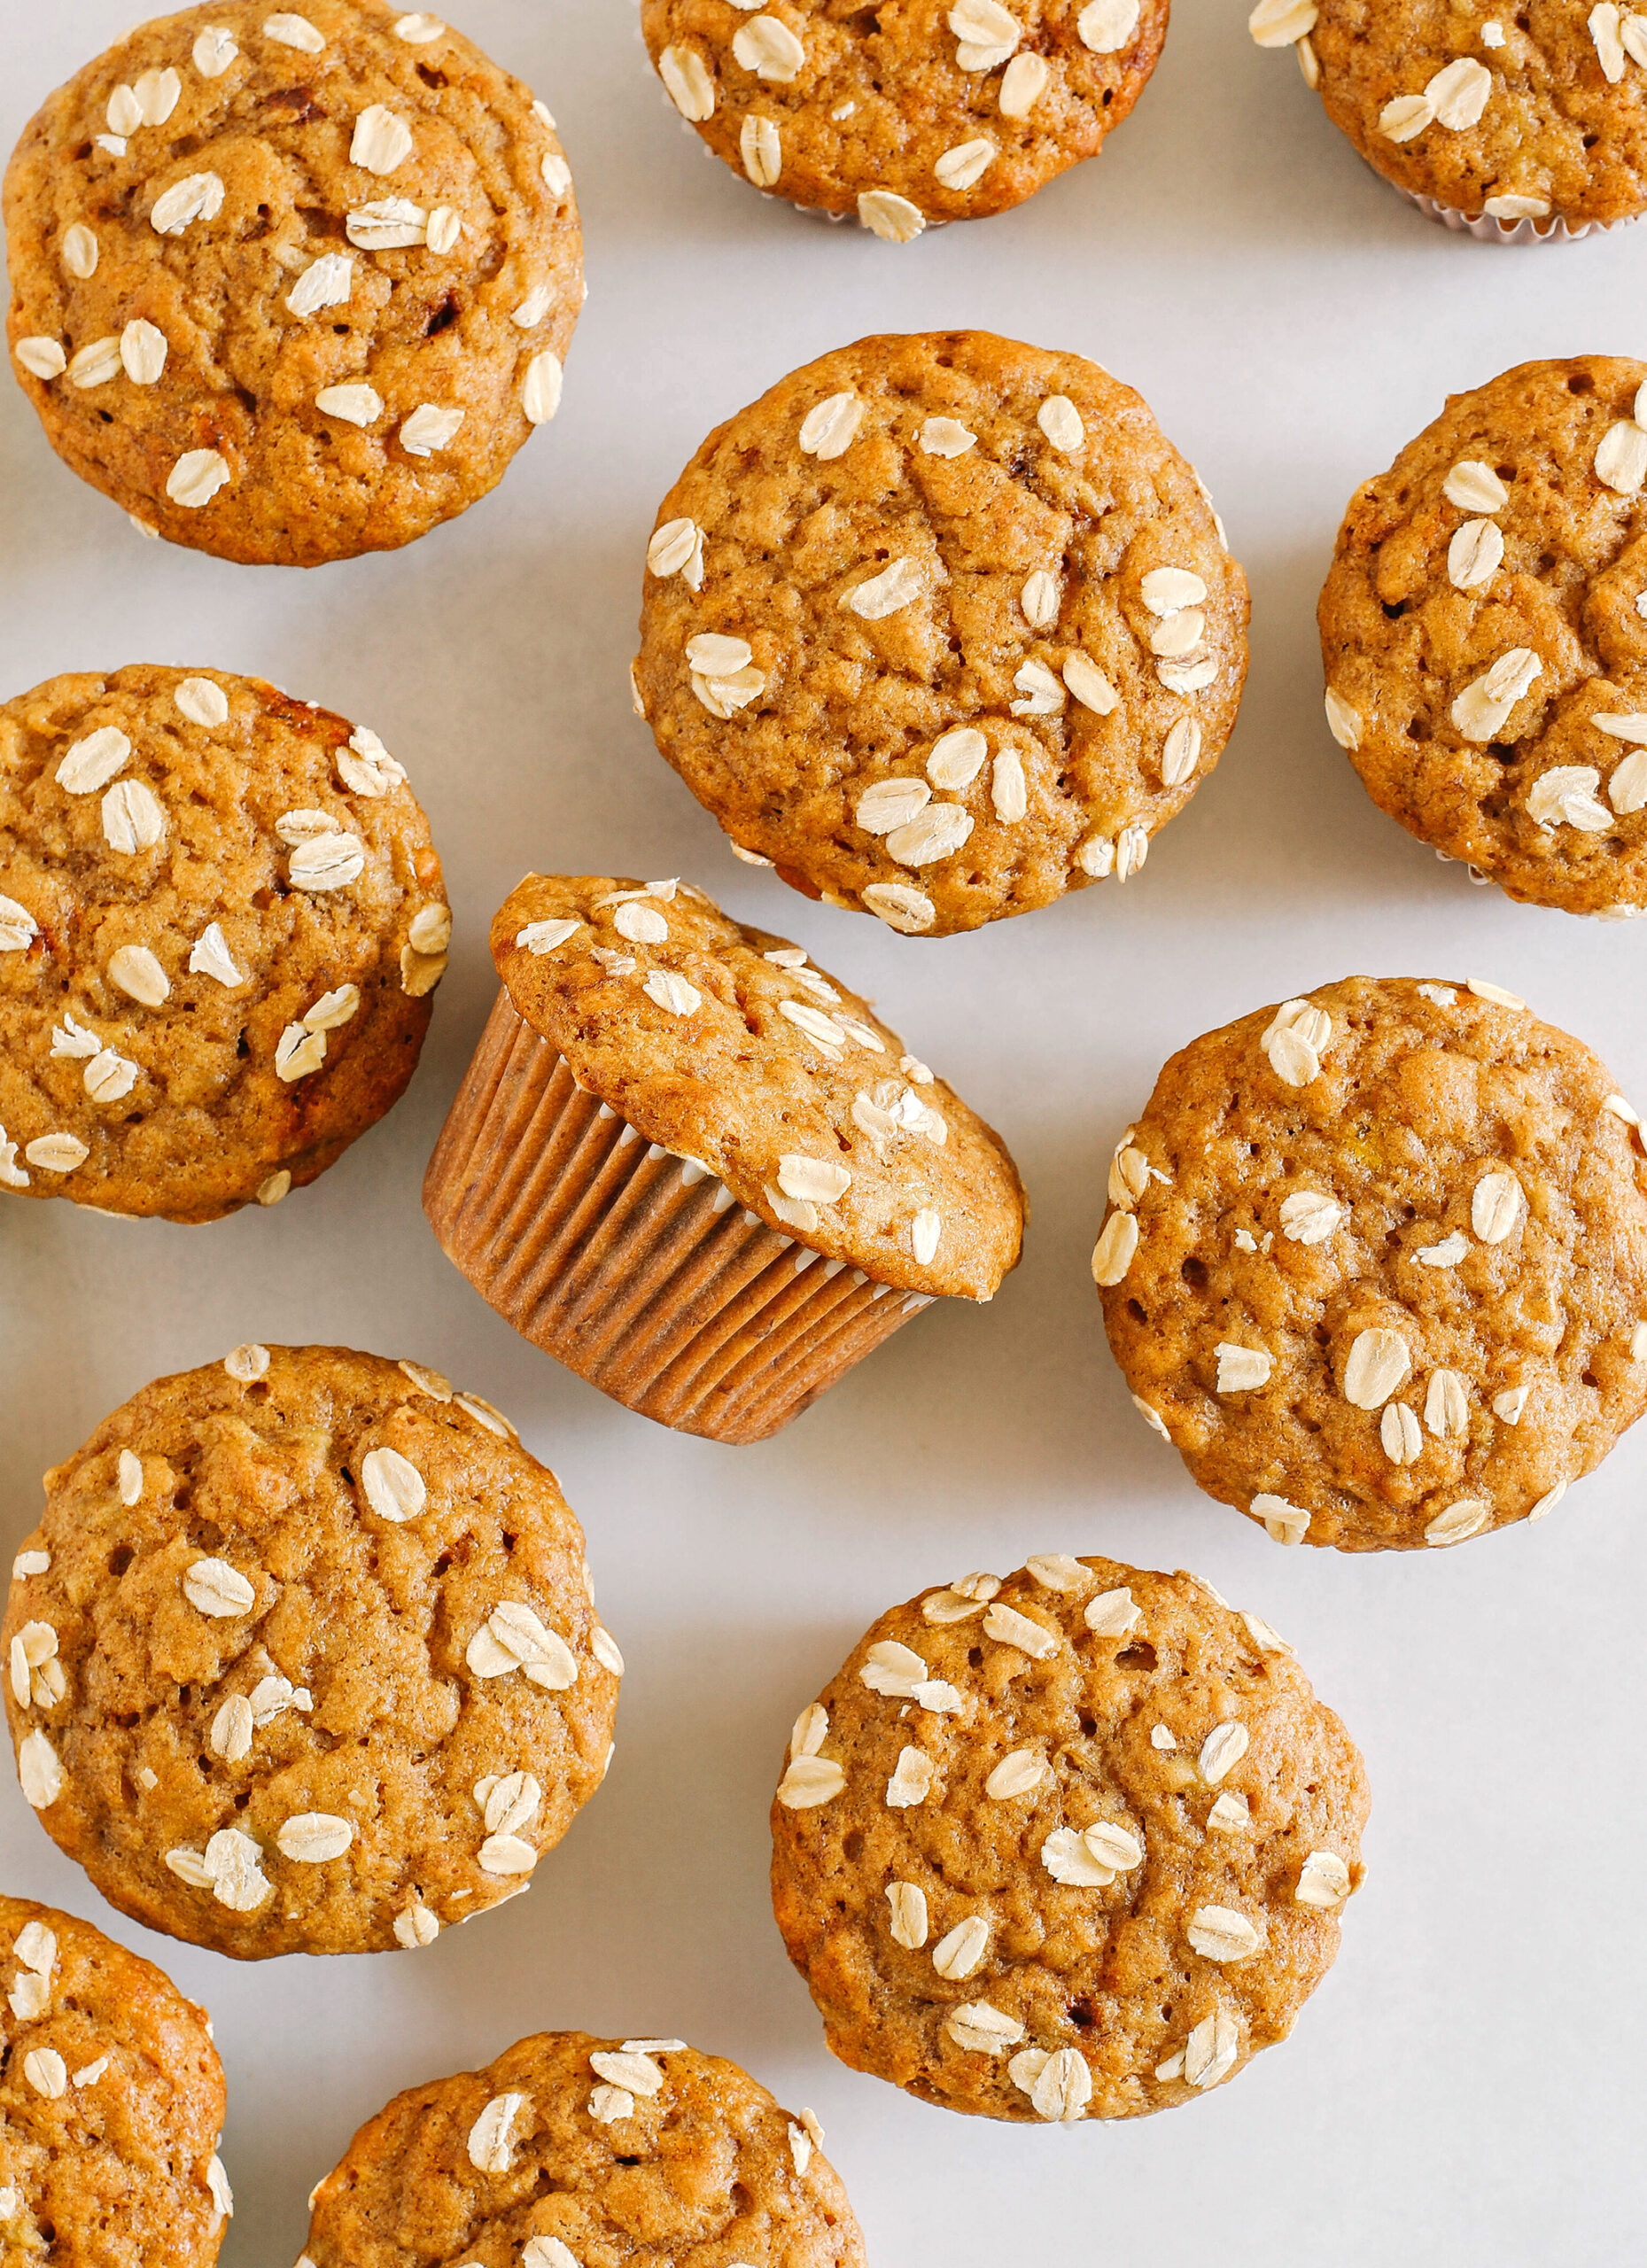
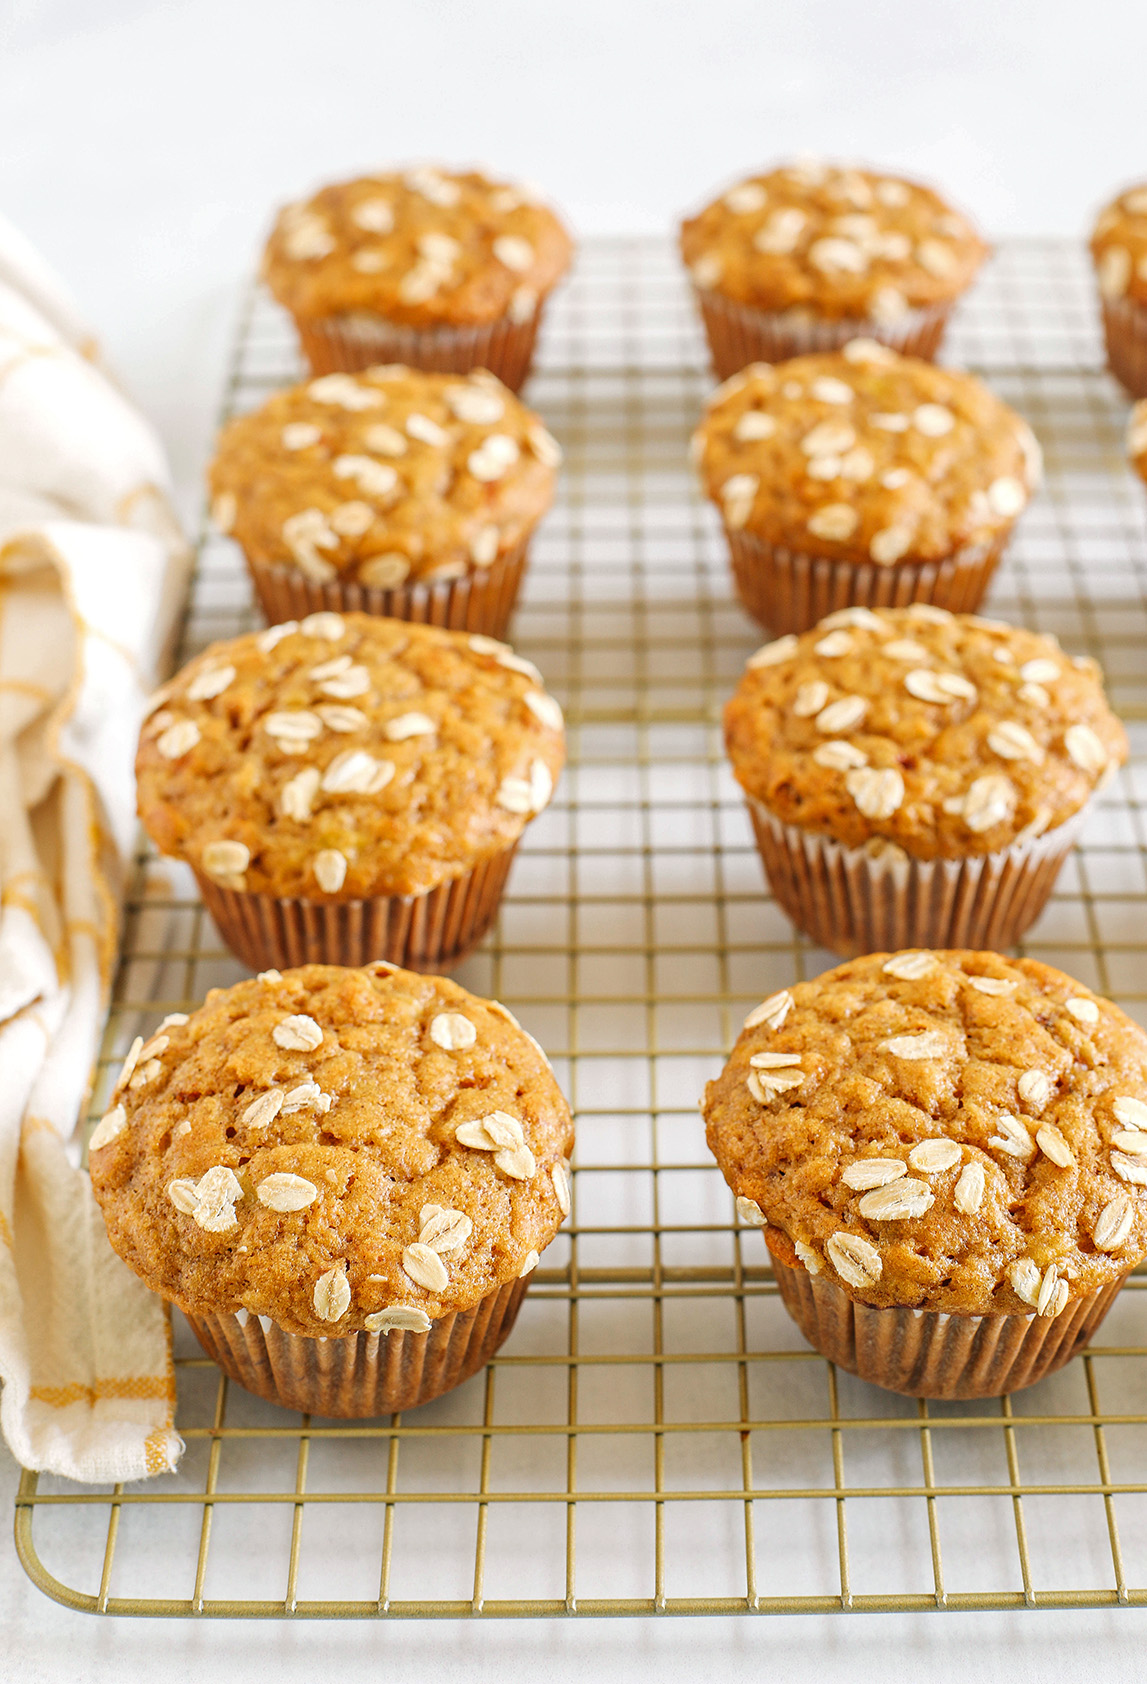
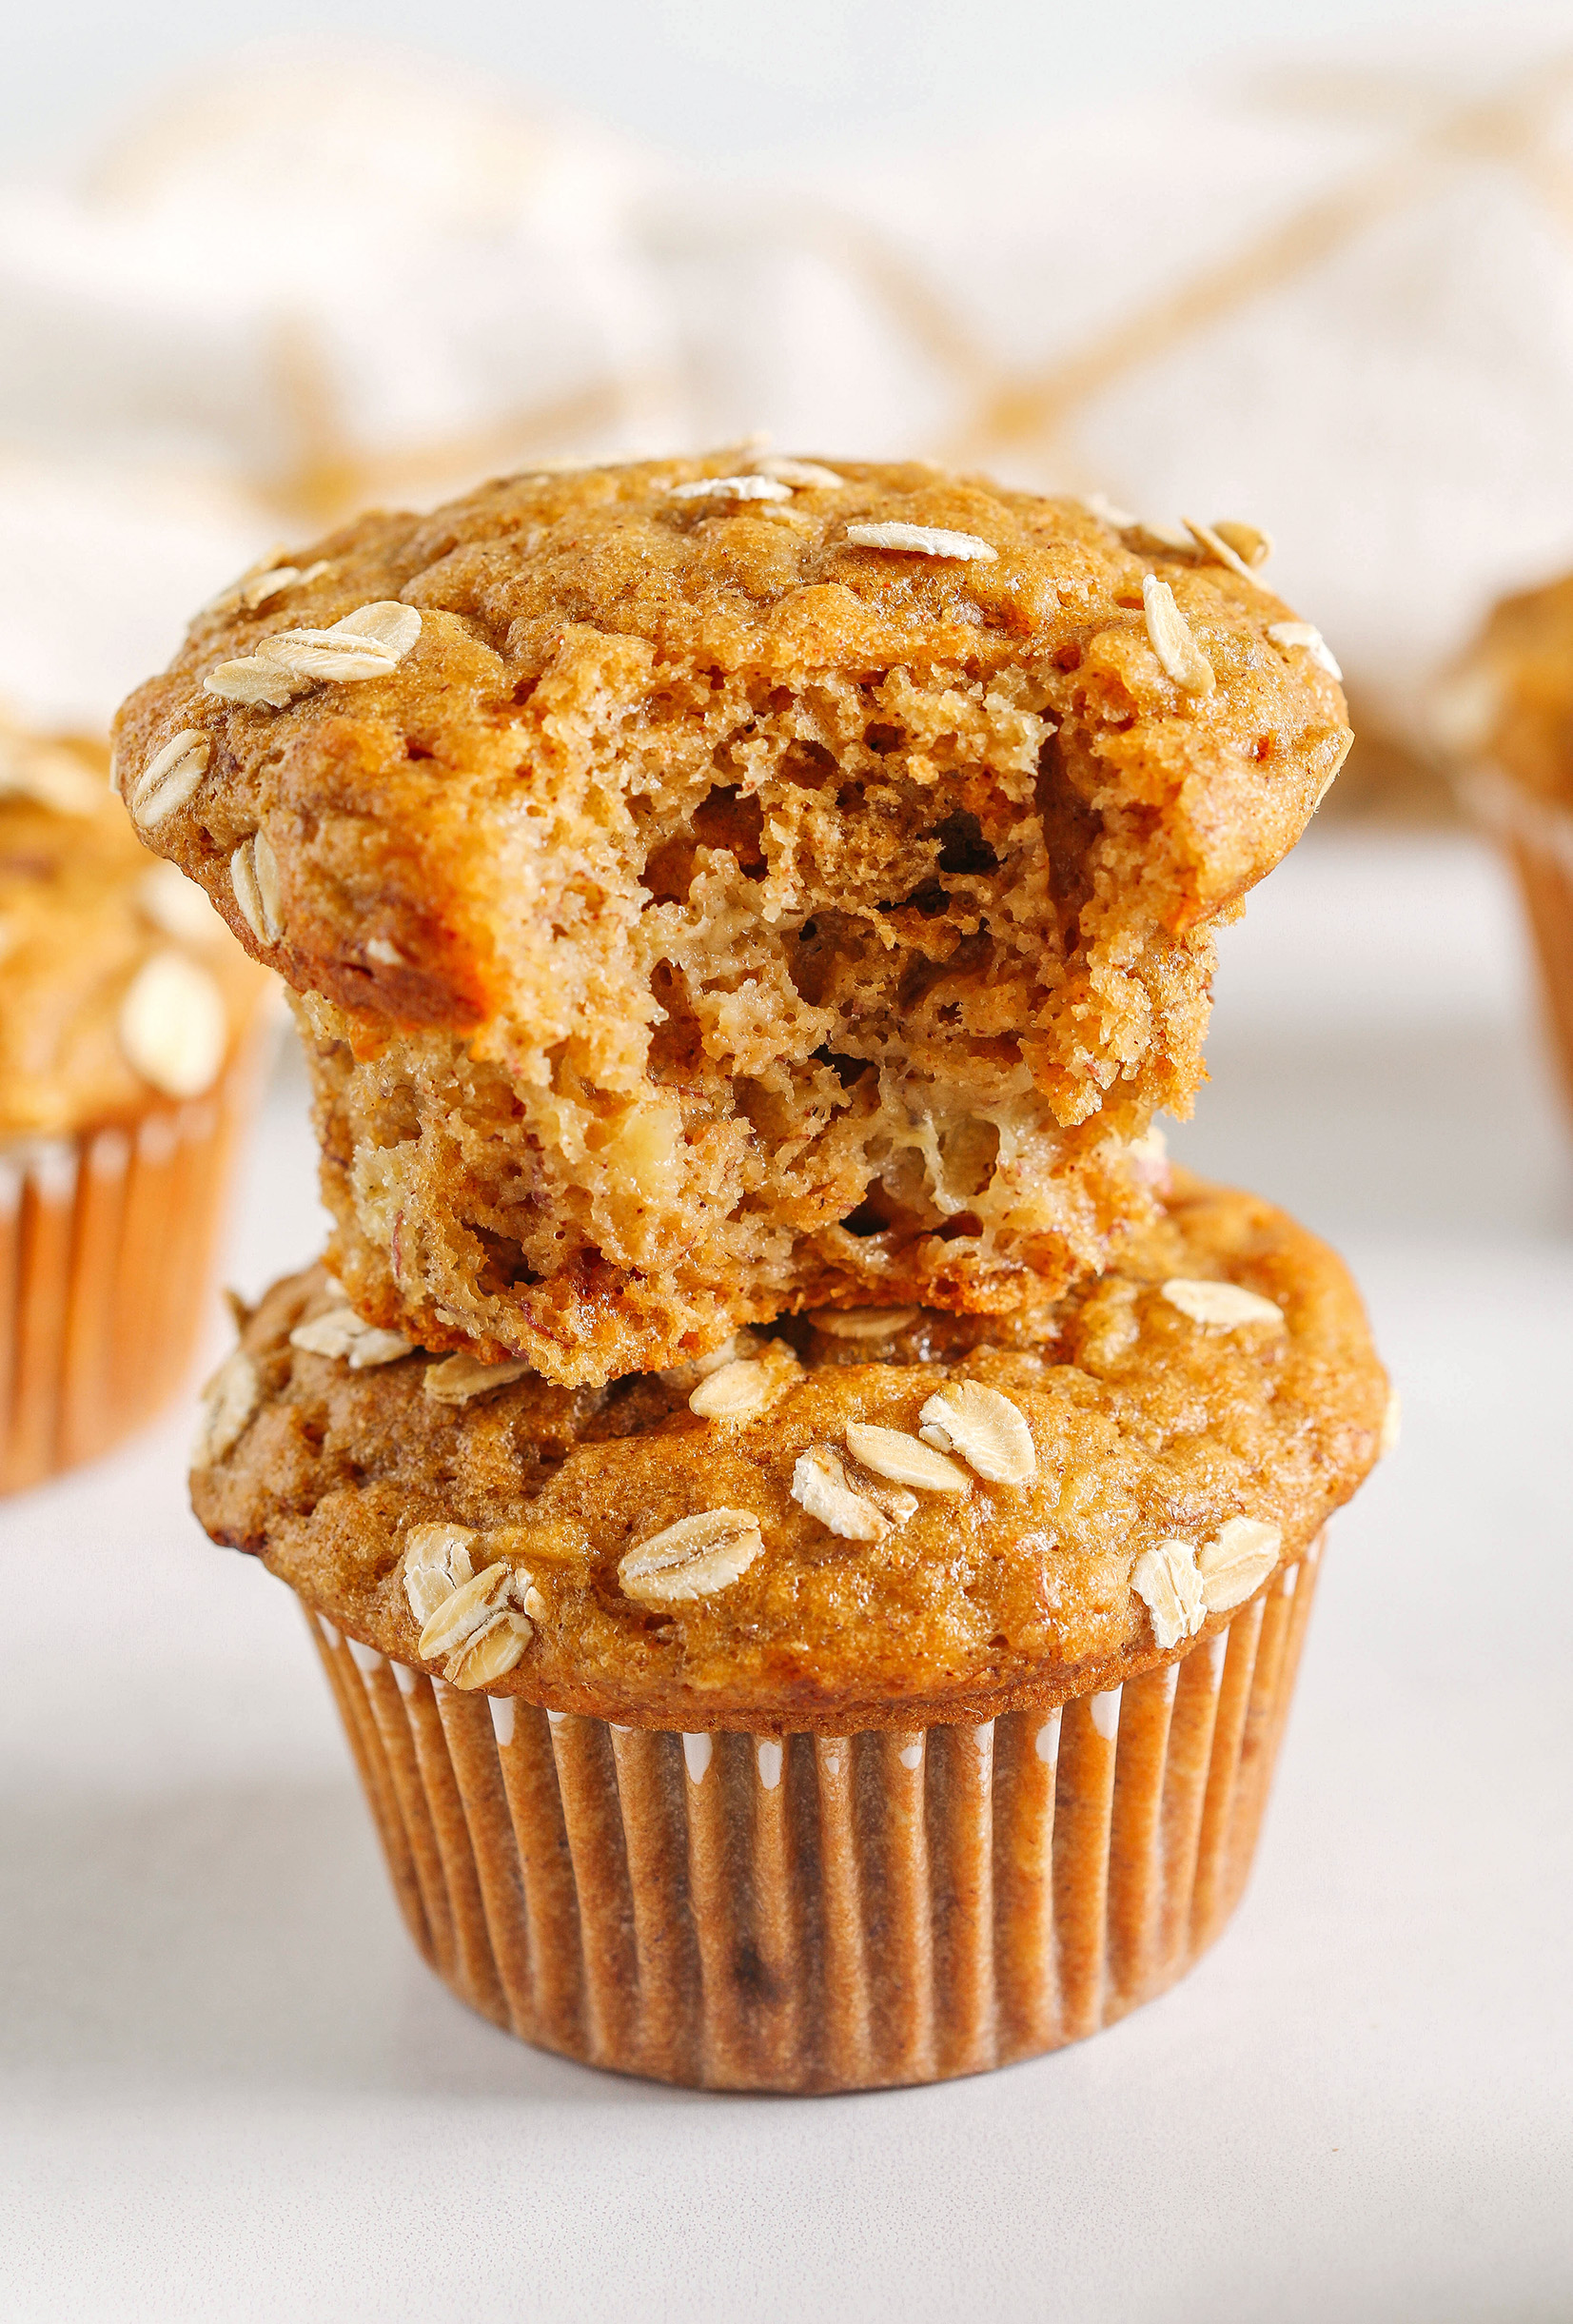
Banana Breakfast Muffins – Eat Yourself Skinny

These Banana Breakfast Muffins are moist, fluffy, and made healthier with whole wheat flour, Greek yogurt, and zero butter or refined sugar.  Loaded with delicious banana flavor and warm spices for the perfect morning muffin!

These Banana Breakfast Muffins are moist, fluffy, and made healthier with whole wheat flour, Greek yogurt, and zero butter or refined sugar.  Loaded with delicious banana flavor and warm spices for the perfect morning muffin!

Is there anything better than warm, cozy banana bread??  Well, make them into muffins and you can enjoy them all week!  These healthy banana breakfast muffins are moist, super fluffy, and the best part is they are easily made in just 30 minutes.  These muffins are made healthier with whole wheat flour, Greek yogurt and naturally sweetened with banana and honey so no sugar needed!  You could also mix in chocolate chips or chopped nuts for even more flavor and texture.  I am certain your family will love these!

Why You’ll Love these Muffins

  • So much banana flavor in every bite!
  • Made with 100% whole grains, Greek yogurt and zero butter or refined sugar.
  • Easily customizable with fun mix-ins like chocolate chips, chopped nuts, shredded coconut, dried fruit or fresh berries.
  • Can easily make this into banana bread or bite-sized, poppable mini muffins for tiny hands.
  • Freezer-friendly so enjoy these all season long!

These Banana Breakfast Muffins are moist, fluffy, and made healthier with whole wheat flour, Greek yogurt, and zero butter or refined sugar.  Loaded with delicious banana flavor and warm spices for the perfect morning muffin!

Ingredients You’ll Need

  • Whole wheat pastry flour – I love baking with whole wheat pastry flour as it has all the nutritional benefits of whole grain flour while making these muffins light and fluffy.  I highly recommend using this, but if you don’t have any on hand you could use white whole wheat flour or regular all-purpose flour
  • Baking soda – acts as a leavening agent to help these muffins rise
  • Bananas – makes these muffins moist and adds additional sweetness
  • Eggs – adds protein and gives these muffins their structure and height
  • Honey – sweetens the muffins without using any refined sugar, but you could also use maple syrup or even regular sugar
  • Coconut oil – for additional moisture and fluffiness!  Feel free to sub with another type of oil if you prefer or even butter
  • Greek yogurt – this helps to reduce the amount of oil we need to use and helps keep the muffins moist.  You could also use applesauce or mashed banana as well
  • Milk – I used almond milk, but any type of milk will work in this recipe
  • Warm flavors – a delicious combination of cinnamon and vanilla extract
  • Rolled oats – optional topping for a little extra nutrition

These Banana Breakfast Muffins are moist, fluffy, and made healthier with whole wheat flour, Greek yogurt, and zero butter or refined sugar.  Loaded with delicious banana flavor and warm spices for the perfect morning muffin!

How to Make Banana Breakfast Muffins

  • Mix ingredients. In a large bowl, whisk together the whole wheat pastry flour, baking soda, cinnamon and salt, then set aside.  In a medium bowl, stir together the eggs, honey, mashed bananas, Greek yogurt, milk, melted coconut oil, and vanilla, mixing until all combined.
  • Make the batter.  Add the dry ingredients to the wet ingredients and mix with a spatula until just combined, being careful not to over-mix the batter.  This is when you can fold in any mix-ins you’d like such as chocolate chips or chopped nuts.  Generously coat a muffin pan with non-stick cooking spray (or use paper liners) and divide the batter evenly between 12 muffin cups, making sure to fill each cup almost all the way full.  Sprinkle the tops with rolled oats, if desired.
  • BAKE!  Bake the muffins in the oven at 350 degrees F for 18 to 22 minutes (mine came out perfect at 20 minutes), or until a toothpick inserted comes out clean.  Let the muffins cool in the pan for about 5 minutes before transferring them to a wire rack.

Prepping and Storage

To Store: You can keep these muffins stored in a sealed, airtight container or wrapped in aluminum foil on the counter at room temp for up to a day, but make sure to refrigerate after that to keep them longer.  These muffins will last up to a week in the fridge in a sealed container.

To Freeze: These muffins freeze really well too!  You can either wrap the muffins individually in plastic wrap or store them all together in freezer-safe bags.  When ready to eat, just pop them in the microwave for 3o to 40 seconds or simply thaw out at room temperature.  These will keep in the freezer for up to 3 months!

These Banana Breakfast Muffins are moist, fluffy, and made healthier with whole wheat flour, Greek yogurt, and zero butter or refined sugar.  Loaded with delicious banana flavor and warm spices for the perfect morning muffin!

More Muffin Recipes You’ll Love

Hope you all enjoy these Banana Breakfast Muffins and if you love this recipe as much as we do, please leave me a five-star rating below and don’t forget to tag me on Instagram using the hashtag #eatyourselfskinny! I love seeing all your delicious recreations!

  • Prep Time: 10 mins
  • Cook Time: 20 mins
  • Total Time: 30 mins

Ingredients

  • 1 3/4 cups whole wheat pastry flour
  • 1 teaspoon baking soda
  • 1 teaspoon cinnamon
  • 1/2 teaspoons salt
  • 2 eggs
  • 1/3 cup honey
  • 1/2 cup plain Greek yogurt
  • 2 ripe bananas, mashed (about 1 cup)
  • 1/3 cup almond milk (or milk of choice)
  • 3 tablespoons coconut oil, melted and cooled
  • 1 1/2 teaspoons vanilla
  • Sprinkle of rolled oats (optional topping)

Instructions

  1. Preheat oven to 350 degrees F.
  2. In a small bowl, whisk together flour, baking soda, cinnamon and salt; set aside.
  3. In a separate bowl, whisk together eggs, honey, Greek yogurt, mashed bananas, milk, coconut oil, and vanilla until all combined.  Add wet ingredients into flour mixture and mix with a spatula until just combined, being careful not to over-mix.
  4. Divide batter evenly between 12 muffin cups sprayed with non-stick cooking spray (or you can use liners) making sure to fill each cup almost all the way full.  Sprinkle the tops with rolled oats, if desired.
  5. Bake the muffins in the oven for 18 to 22 minutes, or until a toothpick inserted comes out clean, then let the muffins cool in the pan for 5 minutes before transferring them to a wire rack.

Nutrition Facts:

  • Serving Size: 1 muffin
  • Calories: 159
  • Sugar: 10.3 g
  • Sodium: 172.6 mg
  • Fat: 4.6 g
  • Saturated Fat: 3.2 g
  • Carbohydrates: 26.2 g
  • Fiber: 3 g
  • Protein: 4 g

* Please note that all nutrition information are just estimates. Values will vary among brands, so we encourage you to calculate these on your own for most accurate results.